|
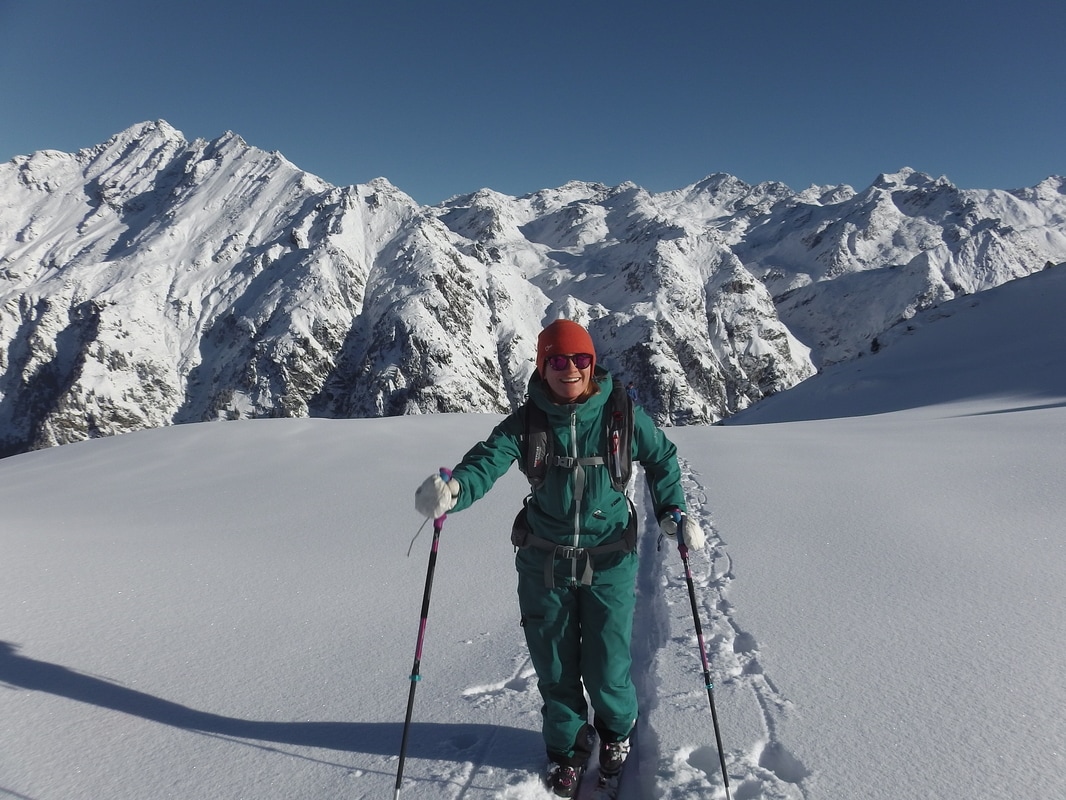
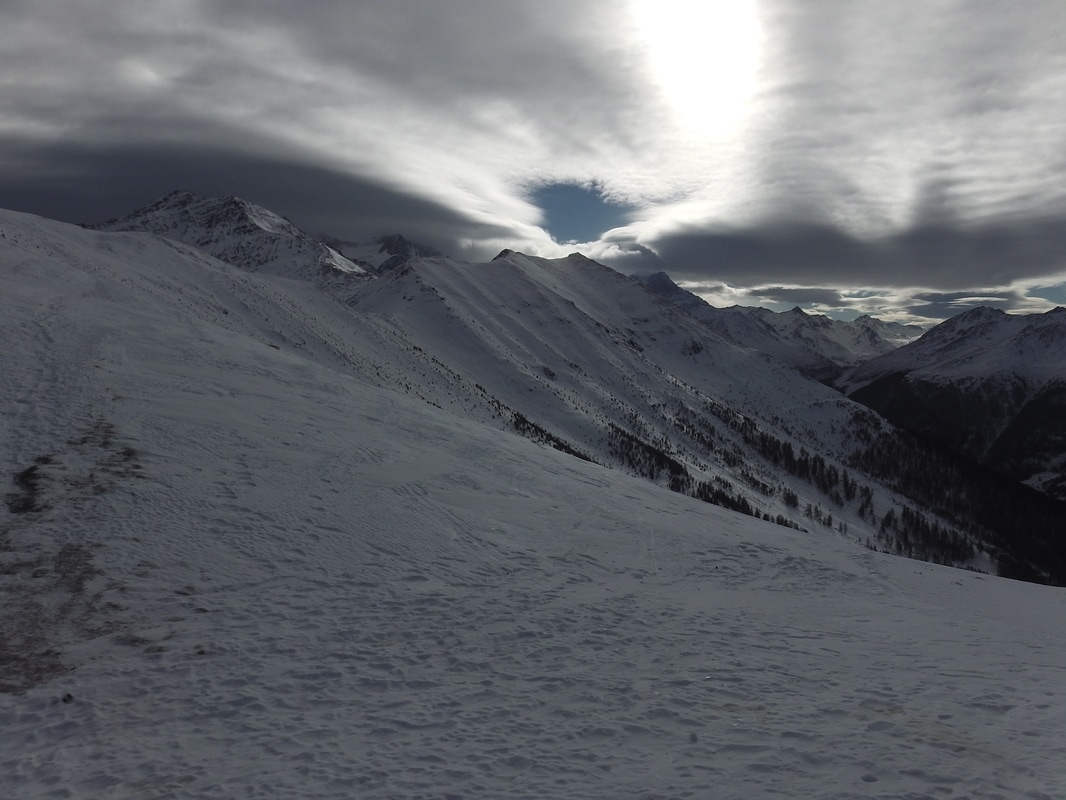
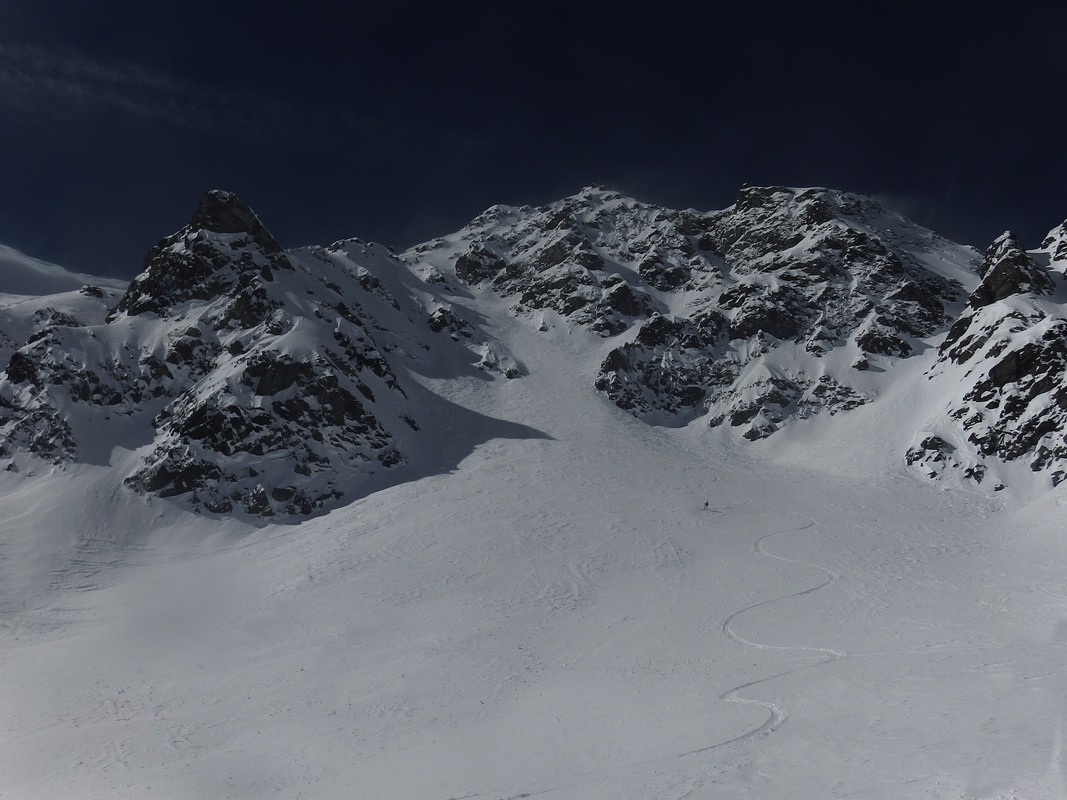
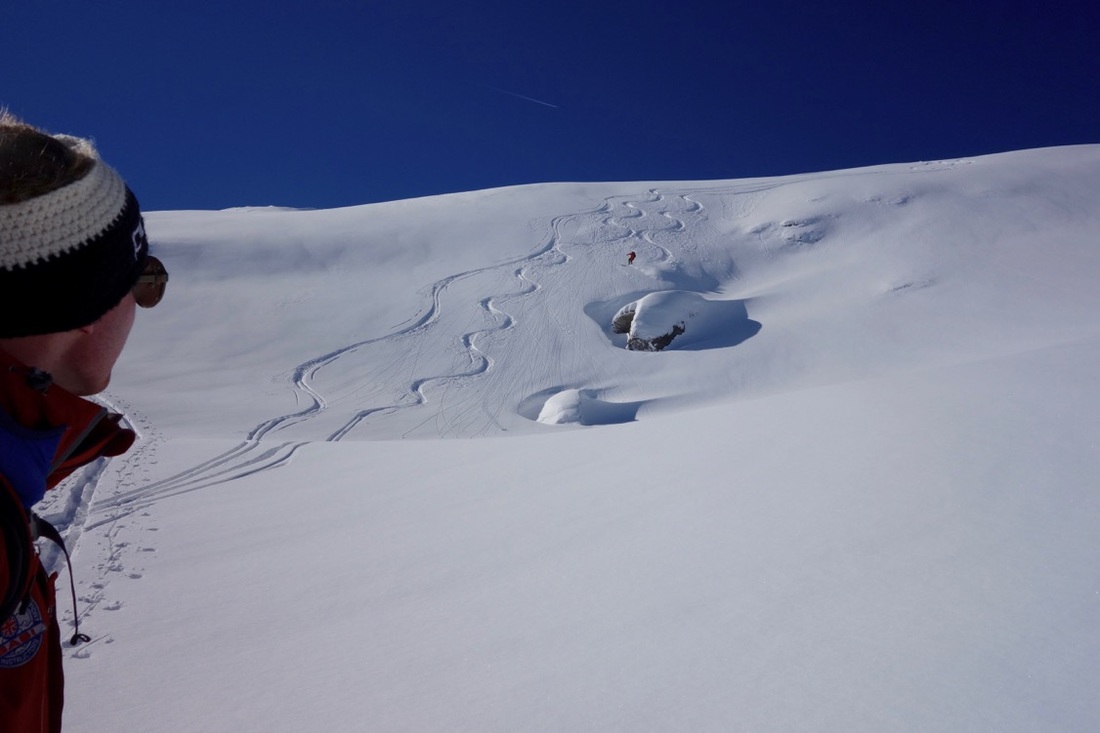
The good news is that the snow has arrived and more is on it's way! The situation is far from perfect though. A limited base and recent high winds means we are faced with some volatile conditions that demands a high level of experience in assessing conditions both ski touring and skiing off piste in the resort. We are privileged to welcome British Mountain Guide Terry Ralphs, based in Leysin, to provide us with a comprehensive run down on the use of avalanche transceivers and avalanche rescue techniques. Search out his contact details at the end of the article if you are looking for an unrivalled high mountain experience! As winter approaches why not brush up on your skills using a transceiver. Imagine the horror of being caught out in an avalanche, trying to find one of your friends and knowing that you could have done better. It is your responsibility as an off-piste skier to be skilled in performing an avalanche rescue. Avoidance is clearly the best policy, so start looking at the weather and avalanche websites at the start of the season, so you have a good feel for how the winter is shaping up before you get onto the slopes. However, life can be very unpredictable and some of the most experienced people get avalanched. So, put yourself in the best possible position and be prepared for the unexpected and get slick at performing transceiver searches. The start of the season can be a tricky time. The snow pack is often unstable and your avalanche awareness skills are rusty, also you will be as keen as mustard to get onto the white stuff... a combination that may make you vulnerable to being avalanched. Here are a few things that I do to prepare myself ahead of time for the winter’s snow activities. Care of your Transceiver The first task is to dig out your transceiver which should have been stored in a dry place with the batteries removed. It is important to start the season with a fresh set of batteries. Always use good quality batteries which are of the same type and have are from the same batch (same expiry date). This ensures a steady voltage to the transceiver which improves efficiency in search mode. Poor quality (budget) batteries could leak which would corrode the terminals of the transceiver making it unreliable. A false economy, I would suggest. Also, budget batteries may not last as long and might be more susceptible to the cold. Rechargeable batteries should not to be used as their power profile drops of quickly and unpredictably, potentially leading to an unnoticed battery failure. I like to use alkaline Duracell batteries which are recommended to be replaced at 40% on the battery indicator (on the Mammut Pulse). This will have given about 250hrs of transmission service. At 20% you should have 10 hours transmission and 1hr search mode. Note that if available on your transceiver “true analogue” mode is much more energy efficient and can be used if you have a low battery and a lot of searching to do. Moisture is another issue for the transceiver, especially through sweating. There has been a documented incident where a skier passed the group transceiver check in the morning, but by the time he was avalanched later that day his beacon could not be detected. The battery terminals had shorted due to the presence of sweat and the group was not able to rescue the skier. It is clearly important to check the integrity of the battery terminals on your transceiver and keep them as dry as practically possible. Transceivers are reasonably robust but care should be taken not to drop them. The graphite aerial may fracture on impact which will render the device defective. I always carry a spare transceiver when out skiing with a group in case of malfunction. I carry my transceiver in the holster provided by the manufacturer, with the screen facing my body to protect it, just above my base layer. This means it’s close to my head, which should ensure a faster airway clearance in case of burial; it’s protected if I am in a violent avalanche and it also keeps the batteries warm. Before the start of the season test that the transceiver works both in transmit mode and search mode. Thereafter, we should test that the transceivers are transmitting each day I use it and once a week I test it in search mode. Group Check and Transmission Interference When checking the transceivers at the start of the tour, it is important to have a “gate” (i.e. the person checking) for everyone to go through, this is to eliminate the chance of someone not being checked. The transceiver check is easier if you have a transceiver which has a check mode, otherwise you have to switch to search mode and isolate the individual transmitting transceivers by using a low search range. Using the Mammut Pulse, for instance, check for 5 beeps minimum with 1m distance between the transceivers normally an arm’s length. In transmission mode, metallic objects, such as phones, radios, foil wrappers, and GPS, etc. should be kept at least 20cms away from the transceiver, as they will absorb the transmitted radio waves and weaken the output by up to 50%. This implies that the transceiver range is halved so that you could be missed in the signal/primary search phase. Make a check with jacket is closed so that a metallic object in the jacket pockets are not later placed close to the transceiver when it is closed. It is possible to detect an affected transceiver during the daily check because the control transceiver would need to move in closer to pick up the signal to maintain the same distance reading or audible beep (depending on the model of your transceiver). For example, the Mammut Pulse will only give a positive beep at 1m distance so if you are 50cms away there is probably a metallic object (phone, on or off) close to the transmitting transceiver. It is very important that in search mode metallic objects (ice axe, probes, shovels etc.) should be 40cms away (in rucksack or behind) as they will interfere with the searching transceiver. The History of Transceiver Development It is useful to know a bit about the evolution of the transceiver as your companions will not always have the same model as yours. There are a few manufacturers of transceivers (e.g. Mammut, Ortovox, Pieps, BCA,) and they produce many different models each with pros and cons. They all work on the 457kHz frequency standard so are compatible. Over the last 30 years’ technology in transceivers has improved dramatically. 1. The first-generation transceivers have a single aerial and work in analogue mode. The aerial transmits radio pulses at about one second intervals. The receiving device translates these radio pulses into audible beeps, the louder the beep the closer the transmitting device. This gives a basic and robust system which works very well if the user is highly trained and practices regularly. The Ortovox F1 was a best seller for this generation of transceiver. These transmitters “beep” in 300ms pulses on the 457KHz radio wave. 2. The second generation gave birth to the digital transceiver which uses two aerials. These enable the searching device to triangulate the position of the transmitting transceiver which is translated into a digital distance reading and direction arrow. It also has an audible beep. It generally results in a much faster search, especially for people who are infrequent users. The Mammut “Barryvox” and BCA tracker DTS mark 1 are examples of this generation of transceiver. These transmitters beep in 100ms pulses as it is easier for the digital processor in the searching device to separate the signals from different transceivers when the pulse is of a shorter duration. It also uses the 457KHz radio wave. 3. The third and current generation of transceivers have three aerials. The main advantage is found in multiple burial situations when the signal can be “marked” and “ignored” once a buried victim has been located, and the subsequent searches can be undertaken without the interference of the found signal. They also solve a problem found in second generation transceivers which can give a false minimum distance reading if the search transceiver (horizontal) and transmitting transceiver aerials are aligned 90* to each other. i.e. if the person/transceiver is buried vertically. The real minimum will be close to the false minimum but time could be wasted probing at these false minimum locations. The third aerial adjusts for this effect so you can be sure that the minimum reading is the one closest to the buried transceiver These transmitters “beep” at the shorter 100ms pulses on the 475KHz radio wave as well. Examples of this type of transceiver are The Mammut Pulse, Mammut Elements, BCA Tracker 2, Pieps DSP, Ortovox 3+ RECCO. Unfortunately, there is an incompatibility between the first-generation analogue devices and digital devices which is important to bear in mind, especially in a multiple burial situation. The Ortovox F1 (and its predecessors) signals tend to drift off frequency as much as by 80kHz from the standard 457kHz frequency. The digital transceivers (2nd and 3rd generation) are highly sensitive devices and can only focus on a one narrow band at a time. So, if there are analogue and digital transceivers buried, the searching transceivers will lock on to the first frequency they find and, if they are not all transmitting on the standard frequency, it will not pick up the other frequencies. So, if you have an Ortovox F1 device picked up first at say 370kHz with a digital transceiver, the device can no longer detect the transceivers which are transmitting at 457kHz, until you switch off the first-generation transmitter or move the search device to a location where the other devices have a stronger signal. Another issue is the change to a shorter beep length from the first to second generation, means that digital transceivers find it difficult to differentiate between the first generation analogue signals due to the longer 300ms beeps because they overlap for a greater length of time. The longer beep is perfect for the human ear to differentiate between multiple burials (transmitters) but not so the digital microprocessors. Which Transceiver Model is best for me? For me, the main consideration is to buy a transceiver which has a long range in both transmission and search modes. The bigger the aerial the longer the range. So, if buried I will be blasting out the strongest signal for the widest range; and if searching I want the most sensitive device to locate buried victims as quickly as possible. Definitely choose a third generation 3 antennae transceiver with a “marking” function as these are the simplest to use. Another consideration is that not all third generation digital transceivers can work on analogue technology. This becomes important if your transceiver screen breaks making the device useless. There are some digital transceivers (such as the Mammut Pulse) that you can search in analogue mode (audible feedback only), which means that you have a fall back should the screen break or become defective. I use the “Mammut Pulse” which has been around for a long time now and has been through 4 software updates to improve its search procedure. It has a large primary aerial which makes it sensitive and it can also be used in true analogue mode, unlike many others on the market including the Mammut Elements. It is rugged and well designed. Avalanche Rescue Procedure The avalanche rescue procedure encompasses a lot more than just using a transceiver and we should all remind ourselves of what is involved before we start going into the winter backcountry. Organising the available resources and galvanising an efficient rescue team, whilst maintaining the safety of the rescuers, are essential for a successful rescue. It is no mean feat to achieve this even in practice situations. Here I am going to focus on the use of the digital transceiver. One thing that you should establish is the range of your transceiver as this varies widely depending on the model. Some more compact models with a small antenna can only mange 25m to 30m range whilst others achieve a 50m range. It is a good idea to place a transceiver on the ground and walk away from it until you lose the signal so you know the limitations of your device. Then walk back to pick up the transmitter noting when you start to pick up the signal. Slowly rotate your transceiver 90* horizontally and 90* vertically to see if that makes a difference in finding the signal. Rescue procedure Remember time is of the essence as the victim may be suffocating in a tomb of snow. Creative thinking is great but this takes time, so here a more procedural approach is needed, hence the need for repetitive training so that we can automate the general procedures outlined below. 1. Stay calm as you will need to be focused. Move to a safe place, if necessary, and warn others of any immediate danger. Be aware of the possibility of secondary avalanches. Watch carefully if you can see any victims being avalanched and make a note of where they were last seen. They will be lying below this so you can safely rule out searching above this point. If no point of last seen was established, you will need to search a greater area. 2. When it is safe you should start the search. Transceivers must be switched to search mode so that the only transceivers transmitting are from the buried victim(s). In search mode, most second and third generation transceivers will turn back to transmit mode after 4 or 8 minutes, (depending on how you have programmed them) in case of a secondary avalanche. Be aware of this as you don’t want a rescuers transceiver to go to transmit mode and interfere with the victim search. If you have a Mammut Pulse then go into “Rescue Send” mode if you are not searching as this will reactivate transmission if there is no detected movement after 4 minutes and you will not interfere with the search. 3. Signal Search: The initial search for a signal from the buried transceiver. This is a very stressful part of the search and you should be moving as quickly as your transceiver can respond. If alone, adopt a zig zag search pattern across the width of the avalanche leaving the distance of the range of your transceiver between the turns. If in doubt keep well within range. If you have more than one searcher, consider making a corridor search leaving the distance between the searchers equal to the range of the least sensitive transceiver. Keep looking for signs of burial (hands, gloves etc.), but stay on your course unless you are certain it is a partially buried victim. Also, rotate the transceiver slowly through 90* horizontally and 90* vertically and listen for the beep as the transceiver will pick up the analogue (audible) signal first which are transmitted at about 1 second intervals. Interference from electromagnetic transmitting objects (power lines, lift installations, turned-on phones, radios, gps, gps watch, heated gloves, snow canons in operation, camera, etc.) can be a problem with digital transceivers in the signal search phase. These cause the digital transceivers to give a ghost reading which isn’t persistent and can cause confusion. If you have a digital transceiver with true analogue functionality such as the Mammut Pulse (in advanced mode) then you should hear the beeps as well as having a digital distance reading if it picking up a transmitting transciever. If there is known interference around the avalanche area you should use a narrower search distance in the signal search phase (e.g. 20m rather than 40m) so that you don’t miss the signal. 4. Coarse Search. Here you can use the analogy to landing a plane. Once you have a signal you can move as quickly as you can following the arrow and ensuring a decreasing distance indicator. Your transceiver will be sending you along the curved flux lines from the transmitting transceiver so don’t worry if you are not going in a straight line. The distance shown on your dial is the distance along the flux line. Hold the transceiver horizontally. At 10m slow down or you may overshoot the victim. The transmitting pulses are at about 1 second intervals so aim for one pace per second after the 10m distance mark. At 10m I put both hands on the transceiver and hold it firmly and squarely in front of me at chest height. At 5m it can help to briefly stop as we need to line up the “plane” (the transceiver) to the runway (the direction arrow) so that we can “fly” directly over the victim in the fine search phase. 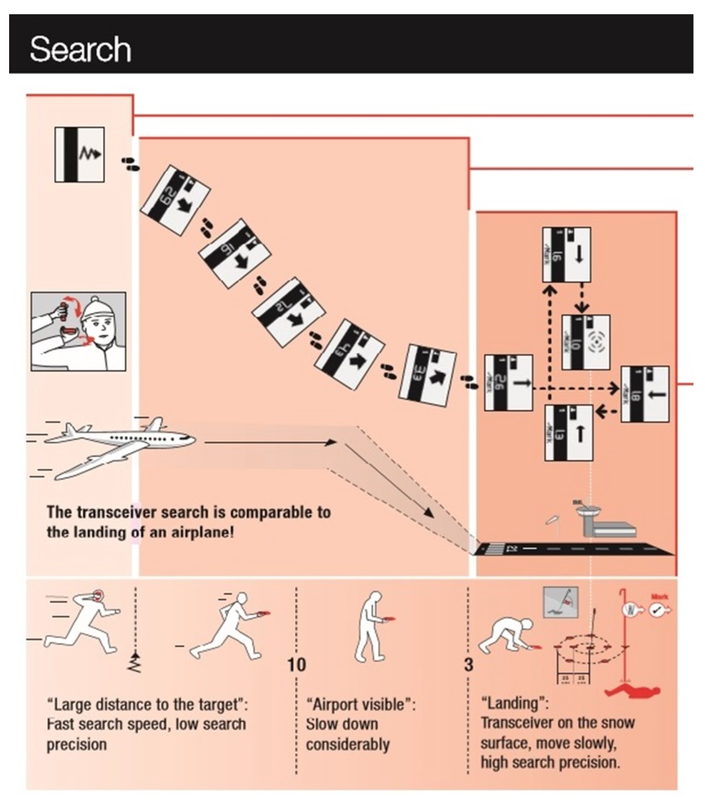 5. Fine Search. At 3m we go into the fine search phase. Lower the transceiver so that it is just flying above the snow maintaining this height. The closer we are to the ground the greater the rate of change of the minimum distance as we approach the victim. Keep your device in the same orientation throughout, don’t rotate it when you move it sideways as this will cause confusion. Within 3m of the victim, really slow down as you need to work with the timings from the one second interval pulses from the buried transceiver. The arrow is now redundant and you should focus on the distance indicator. Keep on the approach line and use this as an axis. Once you find the minimum distance on the approach axis (X) move 90* to form a y axis and see if you can decrease the distance (keeping your transceiver in the same orientation). Keep moving in the grid on the x and y axis until you have found the true minimum. How to rule out a false minimum distance with first and second generation transceivers. On your initial approach continue past your minimum to check to see if the distance reading doesn’t start to decrease again (after first increasing) which would indicate that you have two false minimums. If you suspect that the transmit transceiver is lying vertically within the snow, align your search transceiver vertically as well. Read off the true minimum distance. 6. Probing. Once you have established the minimum distance, probe at 90* to the slope (not vertically, unless the ground is horizontal) to see if you can locate the victim. If you don’t get a strike first time, then probe in a spiral at 25cm intervals. When you locate the victim, keep the probe in as a marker (this is also of psychological benefit for the victim). Here the searcher may “mark” the victim’s transceiver (to eliminate the signal) and move to search for the next victim if resources allow. 7. Digging. If you are on a slope, move down the slope 1.5 - 2 x the depth of burial and dig horizontally into the slope. This is more efficient and safer than digging directly on top of the victim, unless the terrain is flat. If there are multiple diggers, employ an inverted V formation keeping 2 shovel lengths apart and rotate to keep the digger at the front fresh. 8. First Aid. The priority is to get to the head of the casualty and clear their airway, and free the chest, to allow expansion, then administer first aid (Airway, Breathing, Circulation, Deformity, Exposure). If needed, you could use the hole created during the rescue as a shelter to keep the casualty protected. Any burial victim should go to hospital as soon as possible as inhaled snow can cause irritation in the lungs with possibly fatal consequences. 9. Emergency Services. When to call for help is always a balance between the race for self-rescue to expose the victim’s airway which is always the priority, and getting the casualty to a hospital as soon as possible. As soon as you have a surplus person, that person could alert (phone or radio) the emergency services whilst the others perform the search. This will depend on the number of casualties and the number of rescuers. Keep handy the emergency numbers for the area in which you are skiing – 112 for Europe, 144 for Switzerland. It is good to review the procedure outlined above so that in an avalanche rescue situation you are already familiar with the rescue protocol without the distraction of worrying about what you should be doing next. I have also compiled an aide memoire to help. See below. 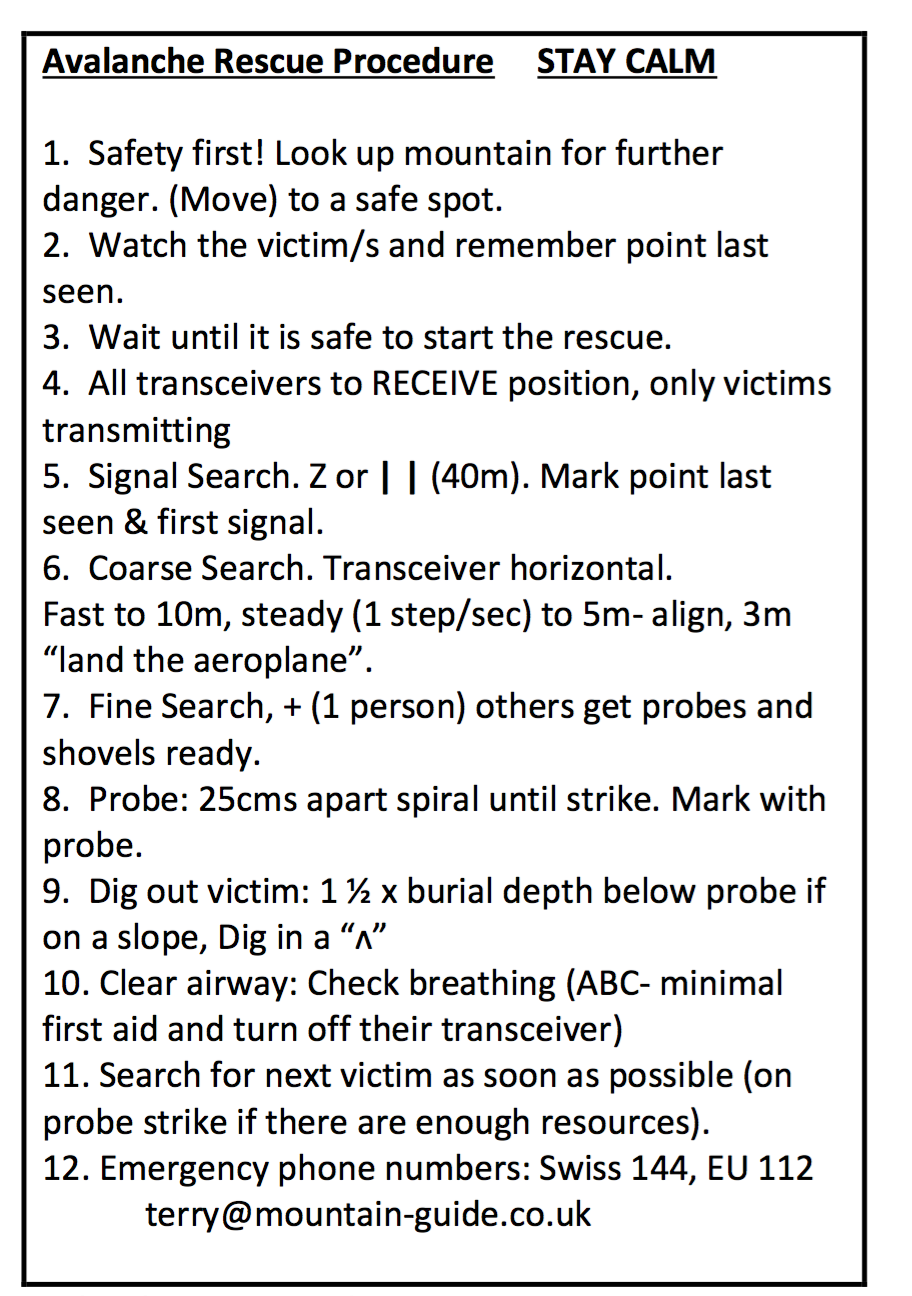 Training with the Transceiver
Getting to know the limitations of the transceiver is essential as well as trying to identify ways in which you can improve your own performance. I always practice before the start of my ski season to improve my confidence and performance. If there is no snow you can improvise using leaves etc. to hide your transmitter. Always protect the transceiver you are burying by placing it into a waterproof padded container (tip: Tupperware boxes are great). In many ski resorts now, you can find transceiver training parks. These excellent facilities are free to use and have transceivers already buried which can be activated by a control box. You can choose from different programmes and time yourself. There is a plate above the transmitter and when the probe hits this plate it turns the transceiver off. Start your training with an easy single transceiver search with the transceiver in view so that you can build confidence and see how the transceiver reacts to the transmitter. You should aim to find a single transceiver in less than 2 minutes from first finding the signal. Then move on to hidden and multiple burials. This is also a good way to familiarise yourself with your transceiver and how it reacts in the 3 search phases. 1. Signal search phase. What is the range of your transceiver? How does the transition going from no signal to obtaining a strong signal go? This can be a delicate transition if your direction of travel is at a tangent to the path to the transmitter. Try moving in and out of this point to get to know how your transceiver deals with this transition and rotate your transceiver through 90* vertically and 90* horizontally to try and line up the induction lines with the primary aerial. 2. Coarse Search phase. (Landing the plane). How fast can you move and maintain focus on the distance reading? If you move too fast, you will be closer than the transceiver indicates and you may overshoot the buried transceiver. Sometimes the 3rd generation transceivers say “stand still” and seem to stall which is stressful and time consuming. This can happen in multi-burial scenarios and the device needs time to process the different signals. This is where a well-trained rescuer using an analogue device has the advantage. Unfortunately, you have no choice but to stand still and wait. From a 10m distance reading you should slow down and move at about one step per second (or beep) so that the transceiver can keep up with you. 3. Fine search Phase. Concentrate on staying on your approach line (x) axis and y axis. Slow down! Move in time with the pulses and move smoothly, be patient and steady. Try marking out a box on the 1 or 2m distance so that you can reinforce the minimum which should be in the centre of the box. Do not rotate your transceiver. If you have a 2-aerial transceiver, check out the false minimum issue - practice with the hidden transceiver vertical and then horizontal. See how the distance changes with the orientation. In Conclusion Remember practice make perfect! I am sure you would want your winter backcountry companions to be perfect in making a rescue, so shouldn’t you be to. We can see how the transceiver and the techniques outlined above can increase your chances of survival but these are not an excuse to push the boundaries of risk management, say to ski a marginal slope. Avalanche prevention is the key as many avalanche victims don’t survive the fall in the avalanche. A metre cube of snow weighs about 500kg so this can give you an idea of the immense forces that can be generated within an avalanche. Being avalanched is not an option. If you would like more help in avalanche training, then please have a look at the ISM courses below. All these courses conform to the Swiss Mountain Training standards and are certified. This is an organisation supported by the Swiss Mountain Guides (SMGA, IFMGA), National Swiss Avalanche Service (SLF) and the Swiss health and safety organisation (SUVA).
3. ISM Advanced Ski Touring Skills Course (http://www.alpin-ism.com/courses/ski-touring-and-off- piste/advanced-ski- touring-skills) This is a more advanced 5 day ski touring course for ski tourers wanting to operate in peer to peer groups (i.e. unguided). This course covers avalanche awareness and self-rescue for an avalanche accident to Swiss Mountain Training level 2. It also focuses on group management and leadership styles to accomplish a well-functioning team regarding group safety. I would like to wish you a safe and enjoyable winter out on the slopes, and hopefully the opportunity to ski with you. References. Louis Piquet, Mountain Guide of Leysin Mammut Documentation SLF Terry Ralphs, Ski and Mountain Guide. Email: terry@mountain-guide.co.uk Mobile: +41796995199
0 Comments
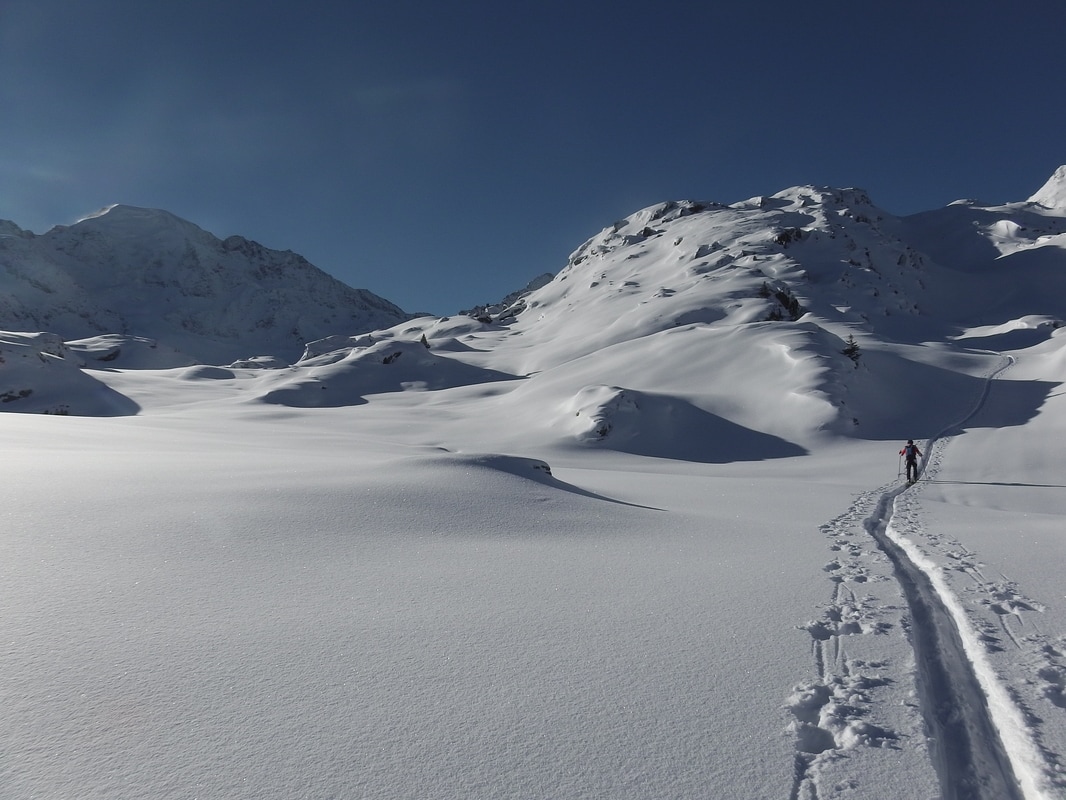
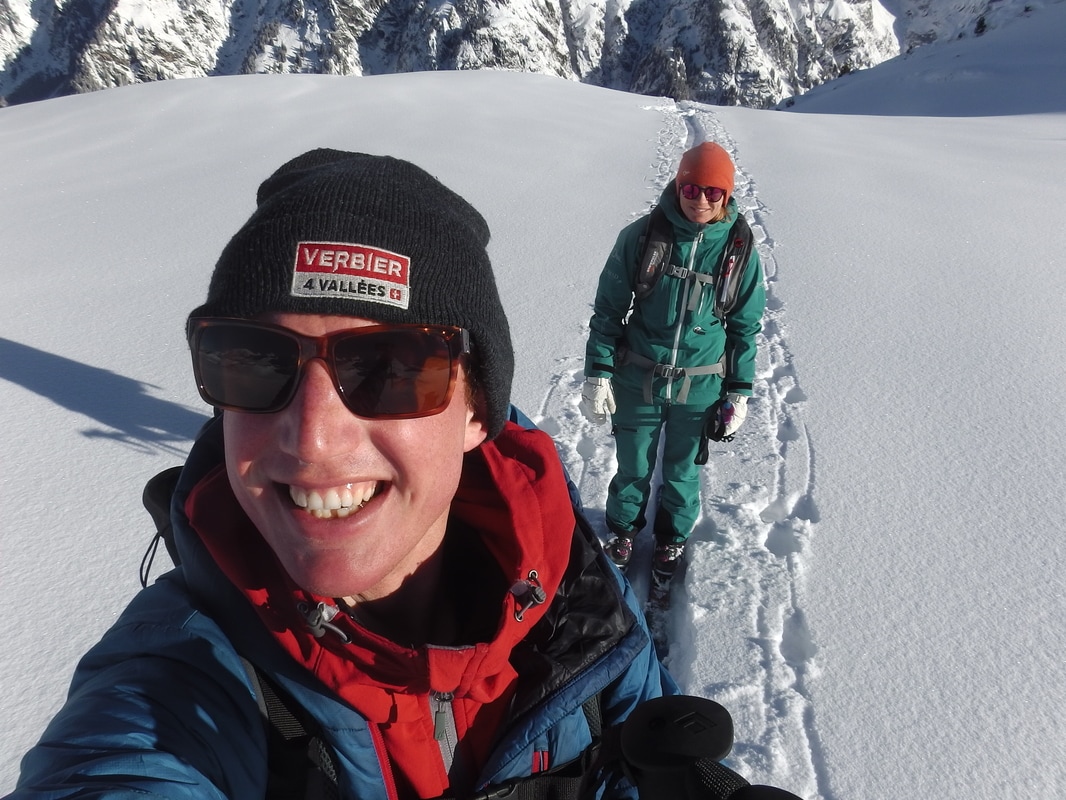
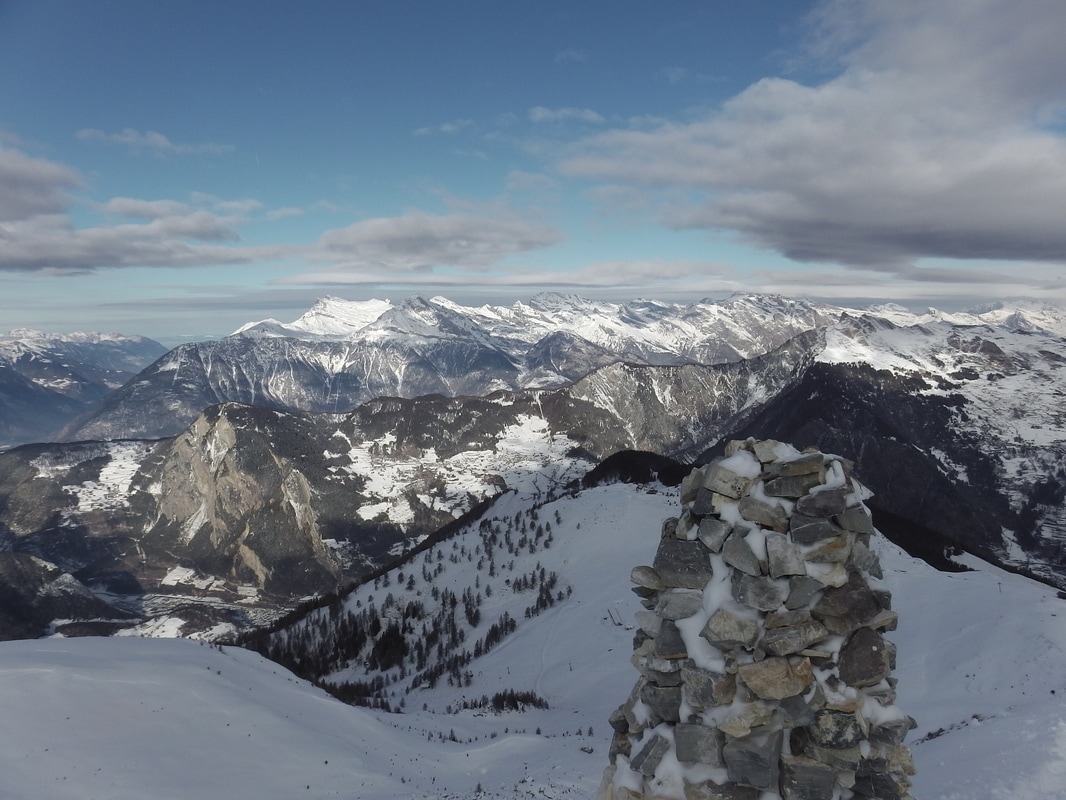
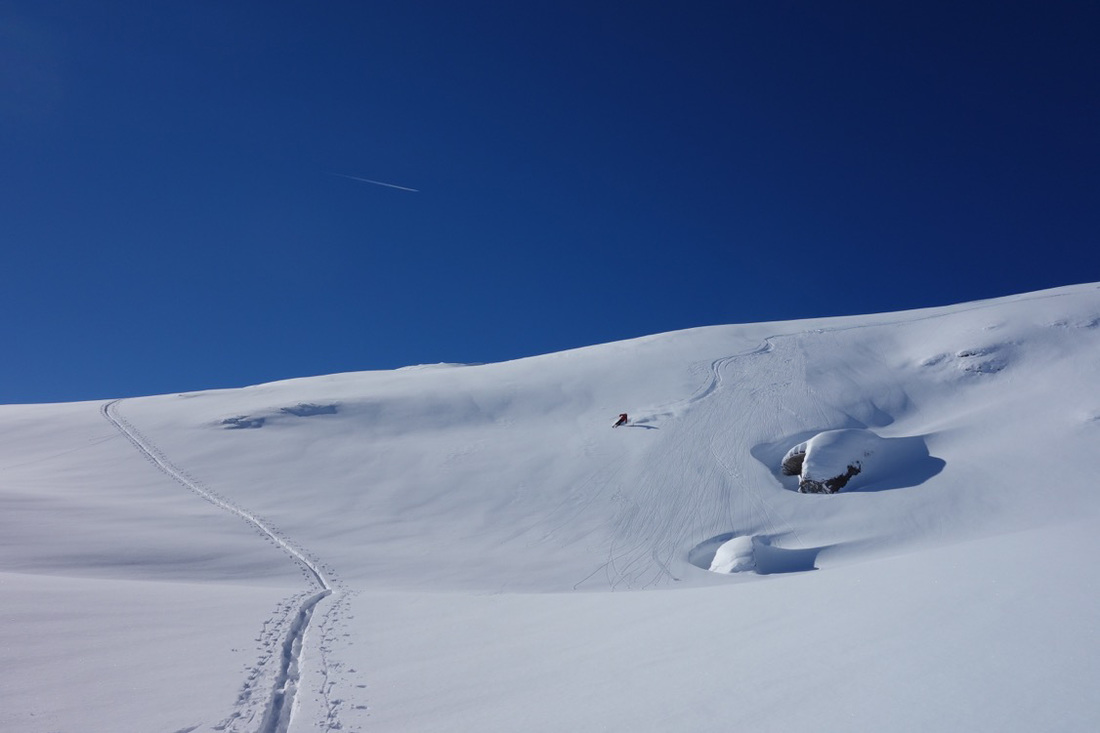
This week's outing was a little more ambitious making an attempt on Mont Rogneux, a 3000m peak that overlooks the Val de Bagnes. Another summit that can be seen from my bedroom, an ascent was long overdue. Joined by ex GB racer and Performance Verbier ski instructor Caroline Powell, it was time to push the vertical ascent starting from La Barmasse via the Cabane Marcel Brunet. The total gain would be 1781m. Sadly it wasn't to be a summit day as recent strong winds had stripped the eastern arête, our intended route, of much of the recent snow making it risky with the limited gear we had. It is always so difficult to pull the plug when the summit it is in sight, but it is an essential skill for any mountaineer, and we called it a day at the col at 2921m. We had still managed a vertical ascent of 1619m, and therefore deserved a beer at Cabane Marcel Brunet on the way down!  The ski down was a little challenging once agin due to recent winds. In some areas the snow cover was very limited and it was a challenge trying to avoid the rocks buried beneath the surface. There were some good turns to be found, and as always it is enough just to be in the mountains exploring new areas. There is ALOT of snow on the forecast which means we may have to be patient for a week or so while it all consolidates, but it looks like we should be in for some incredible off piste and touring towards the end of January and into February. After the welcome snowfall of this week, we set out to see what conditions were like in the local region surrounding Verbier and were pleased to find some cold powder hiding up on the Six Blanc above Bruson. A resident of Bruson, the Six Blanc sits in my back yard, and having looked at its north face for 3 years now, it was about time I skied it! Rather tired from a busy holiday period, we took the lazy option, taking the Pasay chairlift before skinning up to Col de Chargerat. From here you continue up the SE aspect and final arête to the summit, a total ascent of around 350m. We opted for the NE facing descent, a wide 35 degree couloir. The snow at the top had been badly affected by the northern Bise wind, but a little lower down, there was still some light powder hanging around. Once you reach the drag lift in Mgne de Moay, it's a short skin back up to the top of the chairlift, and then a ski all the way back to La Côt. The proximity of the Six Blanc to the Verbier lift system makes it an ideal place for experienced ski tourers to stretch their legs and for first timers to discover the feeling of reaching such a beautiful summit without hours and hours of slogging uphill!  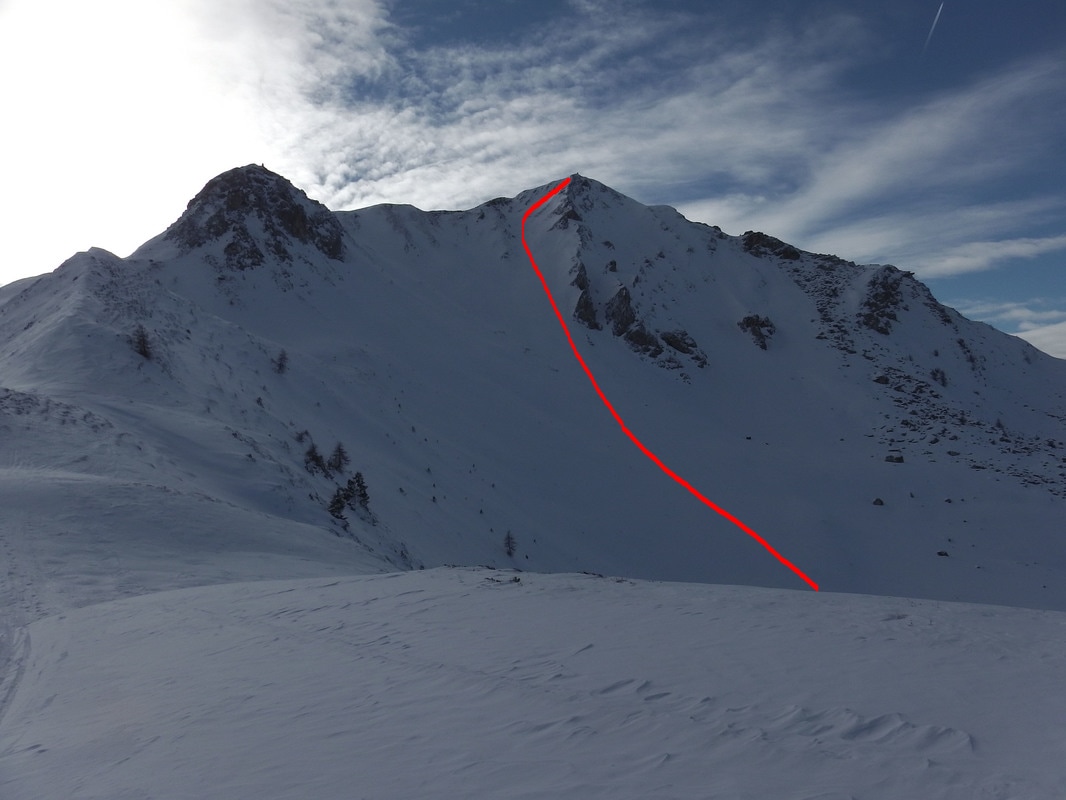 The NE descent from the Six Blanc 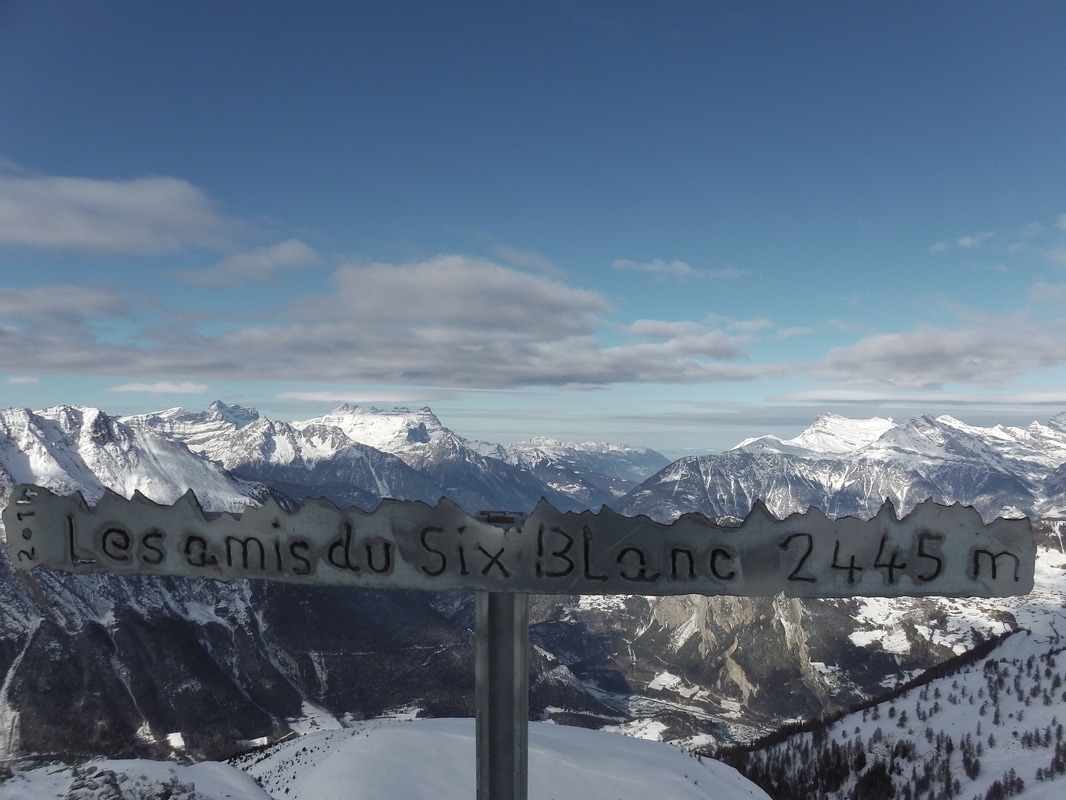 The summit post with Les Dents du Midi and Dents de Morcles in the background The ski touring blog continues this season with a detailed insight into some of the thousands of classic routes throughout the Alps. We kicked off this season in style heading with Performance Verbier ski instructors Ben Proudlove and Johanna Obermoser to the Breithorn, a 4000er in the glaciated paradise above Zermatt, on the border between Switzerland and Italy. 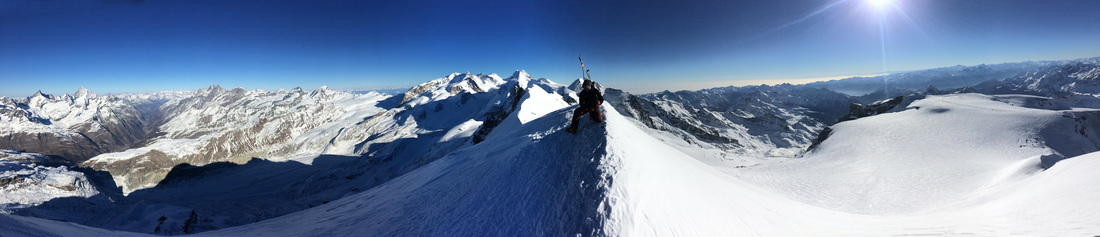 We started our climb from La Testa Grigia on the Italian border meaning we had around 5km distance to cover, climbing a vertical distance of 719m, not an easy task at this altitude especially early in the season. 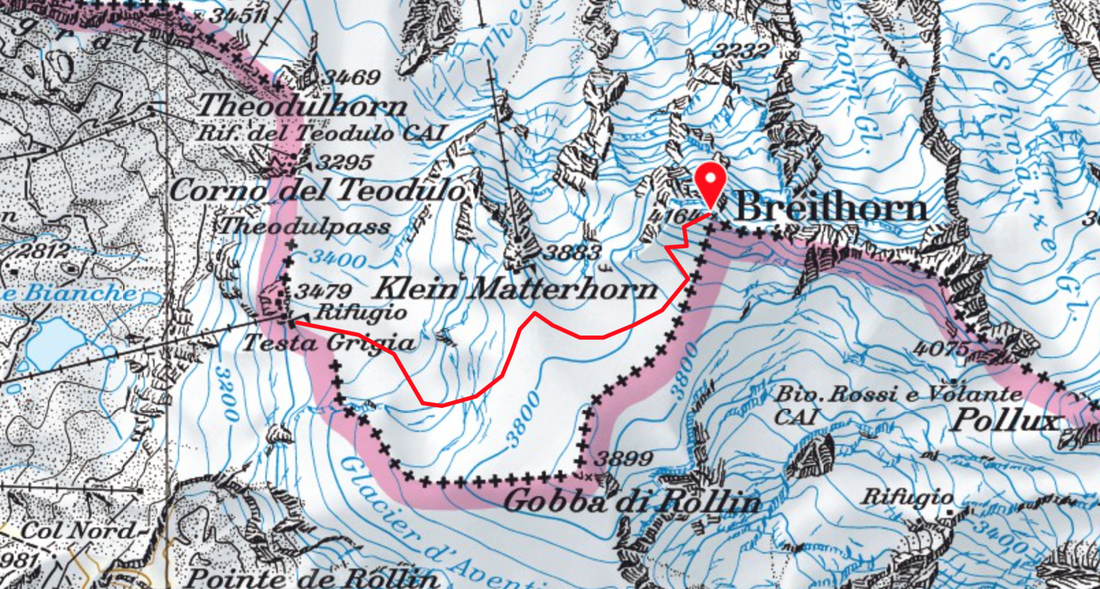 The initial climb from La Testa Grigia to the Breithorn Plateau is relatively straightforward, following the piste all the way to the col at 3795m. From here we travelled roped across the plateau contouring round to the south to keep clear of the crevassed area to the east of the Kleine Matterhorn. We continued skinning, now with ski crampons on, up towards the base of the rock band on the SSW flank. A lack of recent snow and strong winds meant the snow was hard and compact, much closer to summer than winter conditions. Traversing the face we reached the Western ridge which leads up to the summit. Care needs to be taken here to keep clear of the Cornice along the northern aspect of the ridge. We soaked up the views from the summit and shared some Schnapps courtesy of our Austrian Johanna! Given the conditions, we weren't expecting much for the descent. Skiing off the summit we took it easy on the exposed 35-40 degree face before skiing left back towards our skinning tracks. Speed was key as we reached the plateau so Ben headed of first, the test dummy for the rollercoaster ride across the sastrugi. Johanna and I follwed suit praying we would arrive back at the end of the Breithorn Plateau with all our ligaments still intact! We were the only group to ski off the summit that day, a rare occurence on the Breithorn! We all made it in one pice and enjoyed the ski all the way back to the car at Cervinia, a vertical descent of 2114m! Now we have found our touring legs, it's time to start planning many more outings. The 2016/7 season is in full swing!
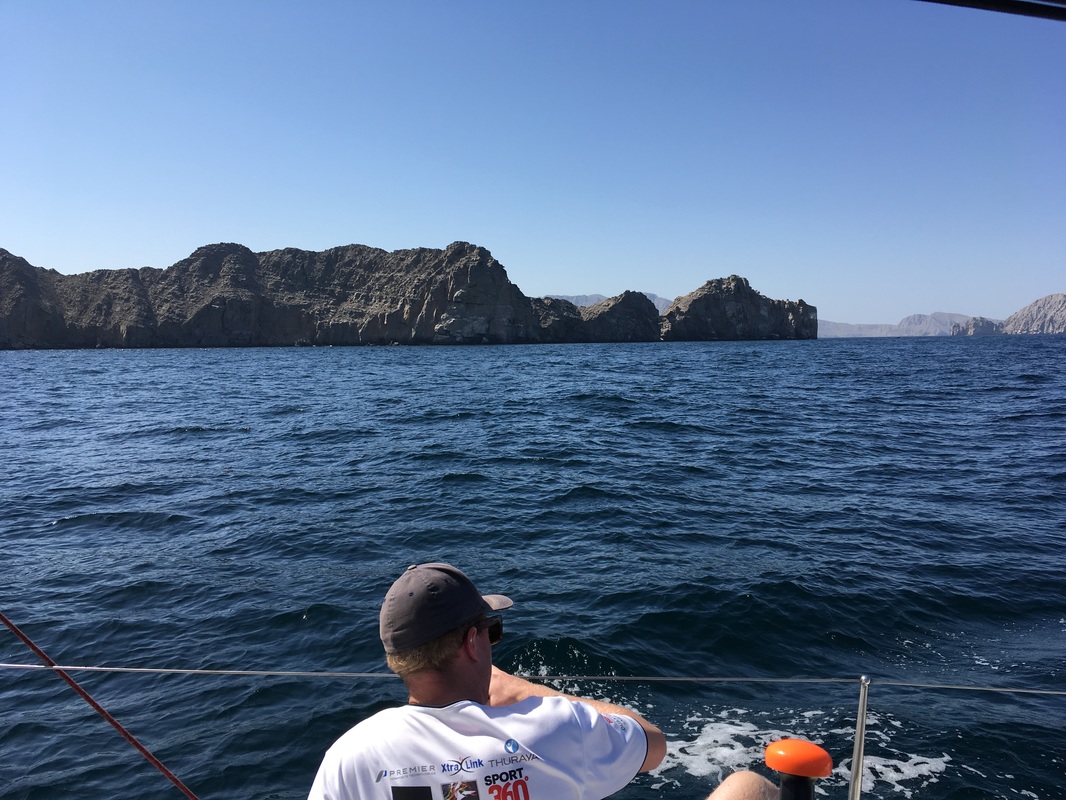
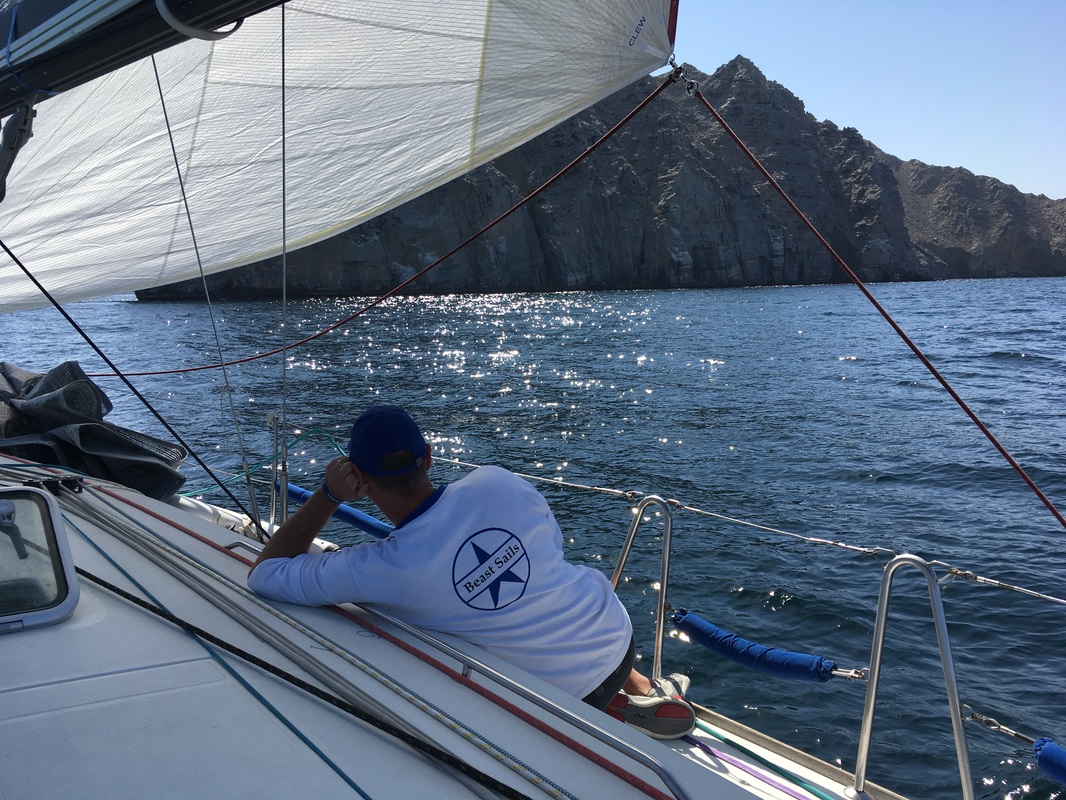
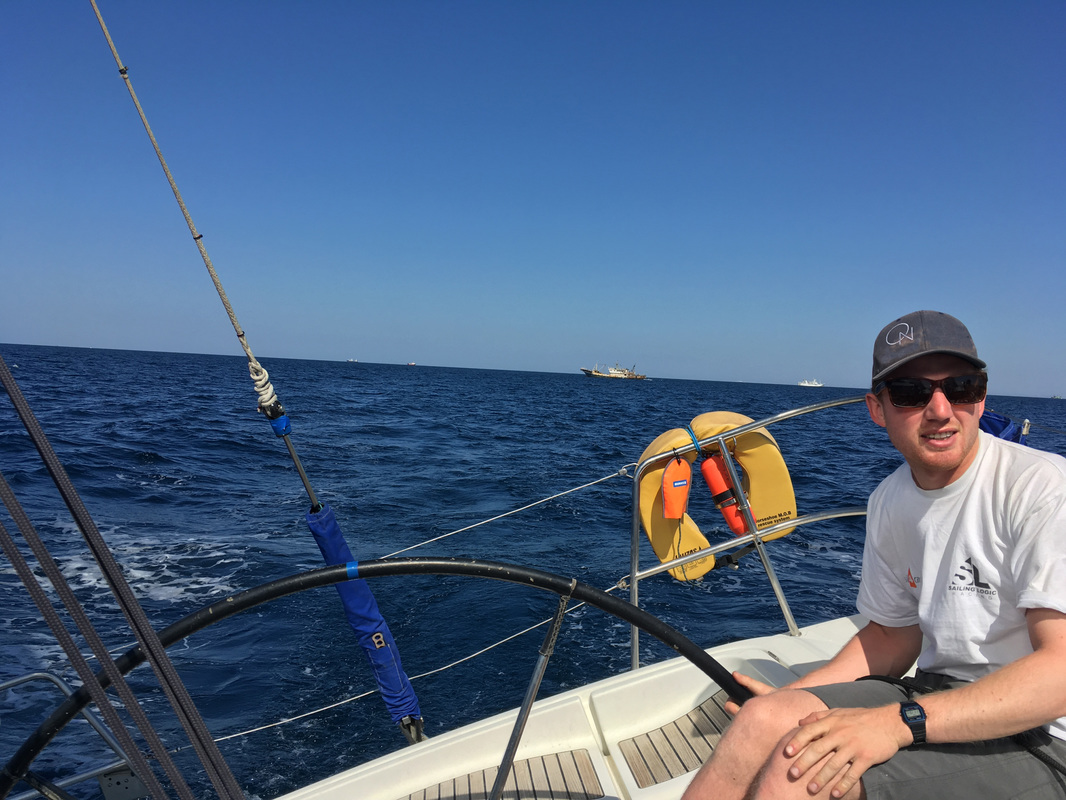
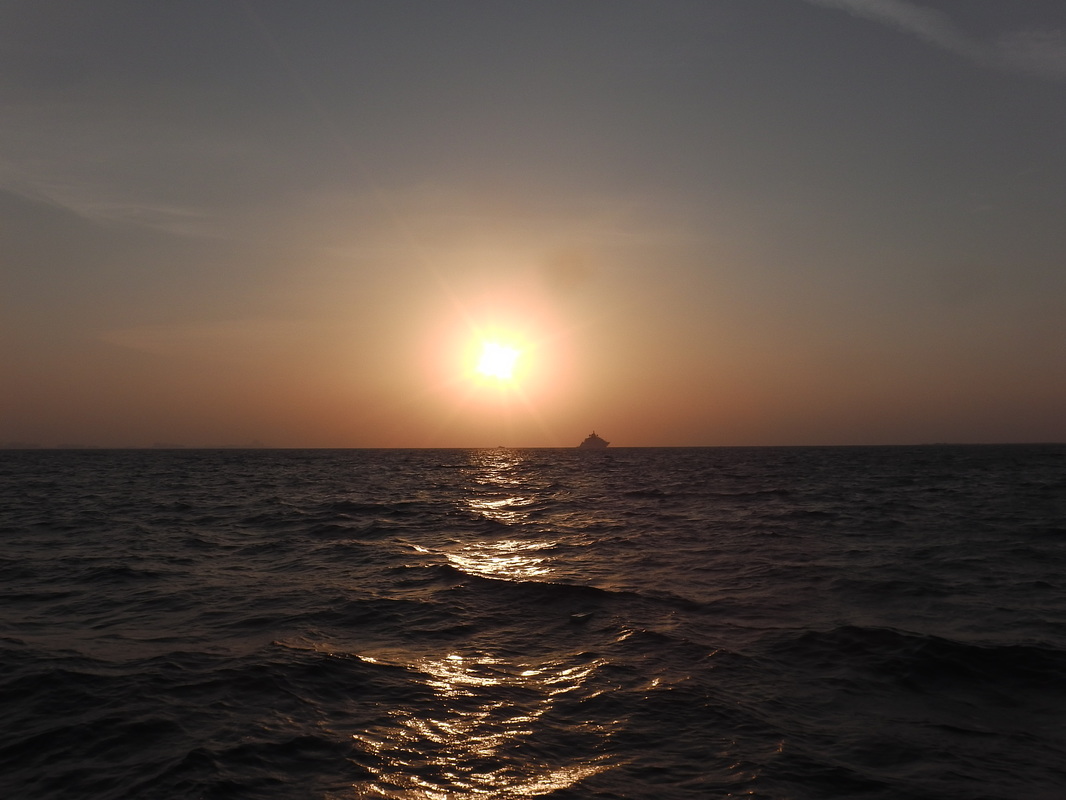
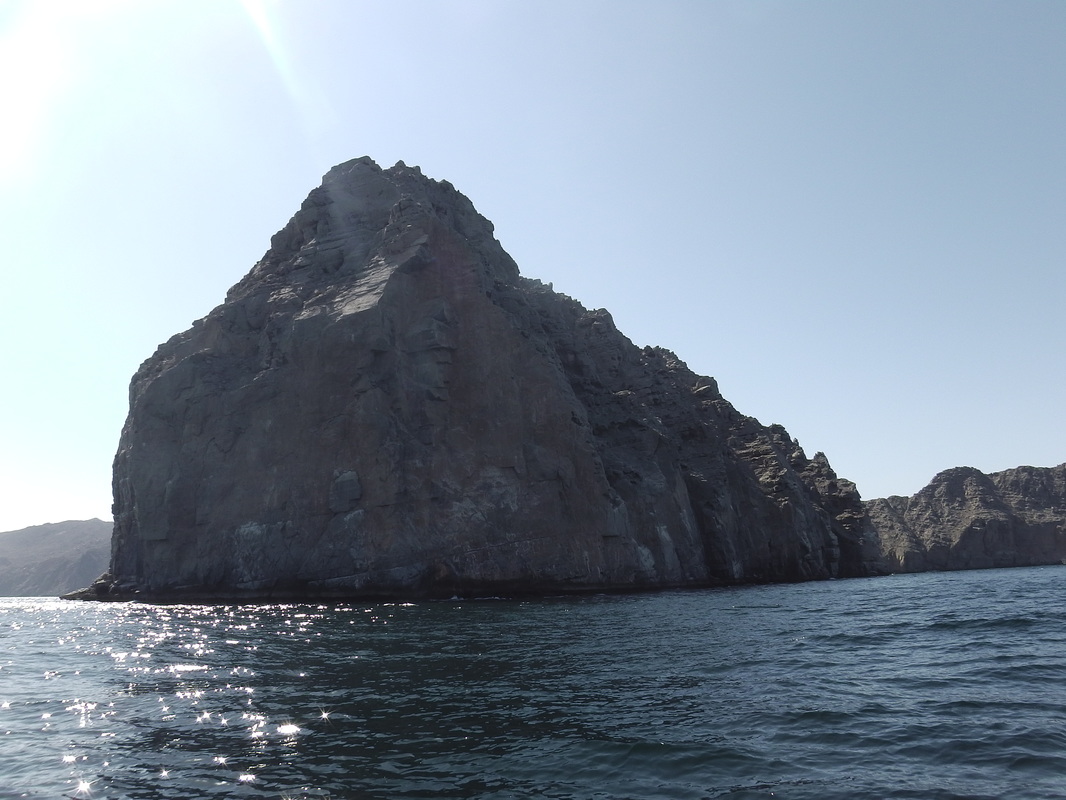
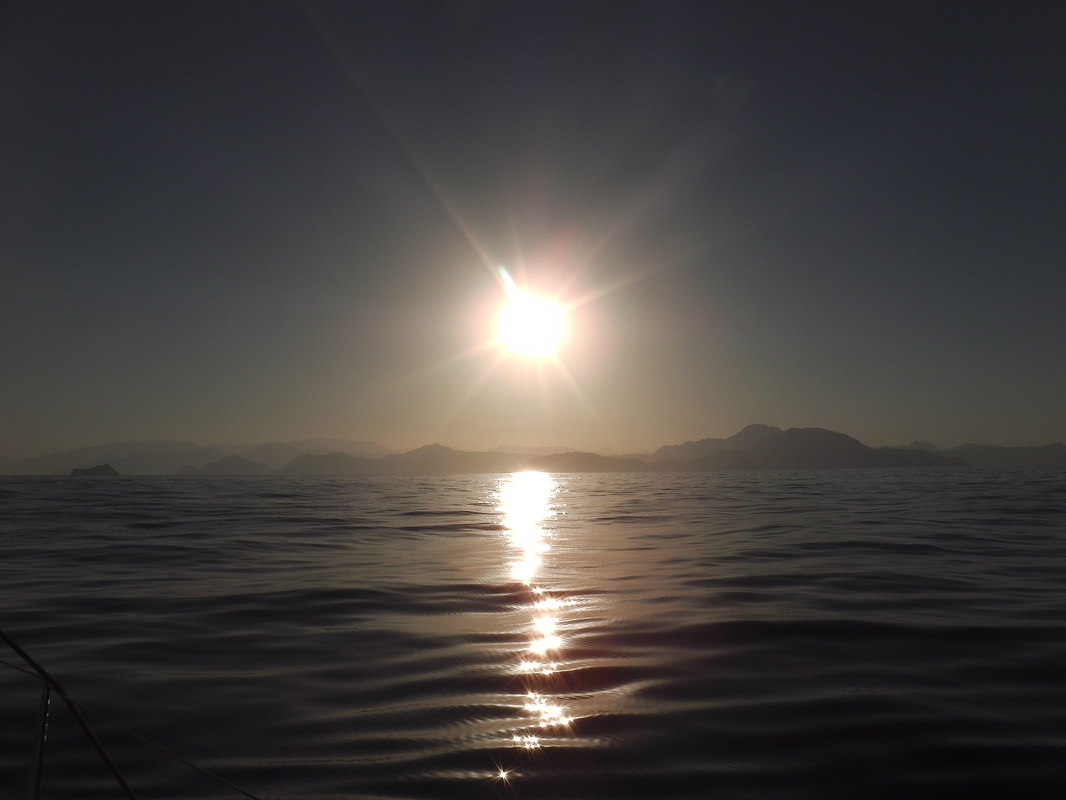
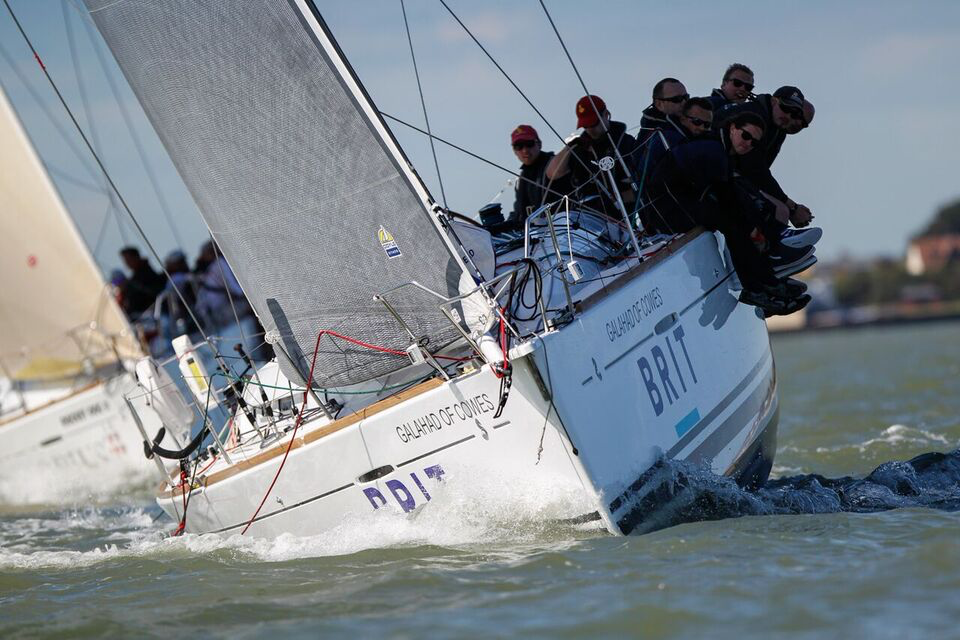
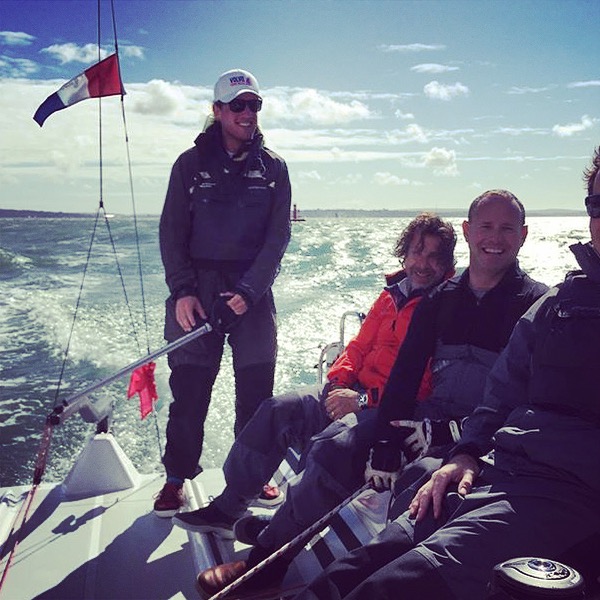
Once the UK sailing season came to a close, instead of heading straight to the mountains, I was given the opportunity to join a team led by Francis Carr onboard his First 44.7 'Faith' to compete in the 25th anniversary race from Dubai to Muscat. The race was first held in 1992 after much debate between the Dubai and Omani authorities and this year would be the 25th edition. The course takes boats up the coast from Dubai to the Straights of Hormuz, a narrow shipping lane between the UAE and Iran, and then into the Indian Ocean all the way to Muscat. 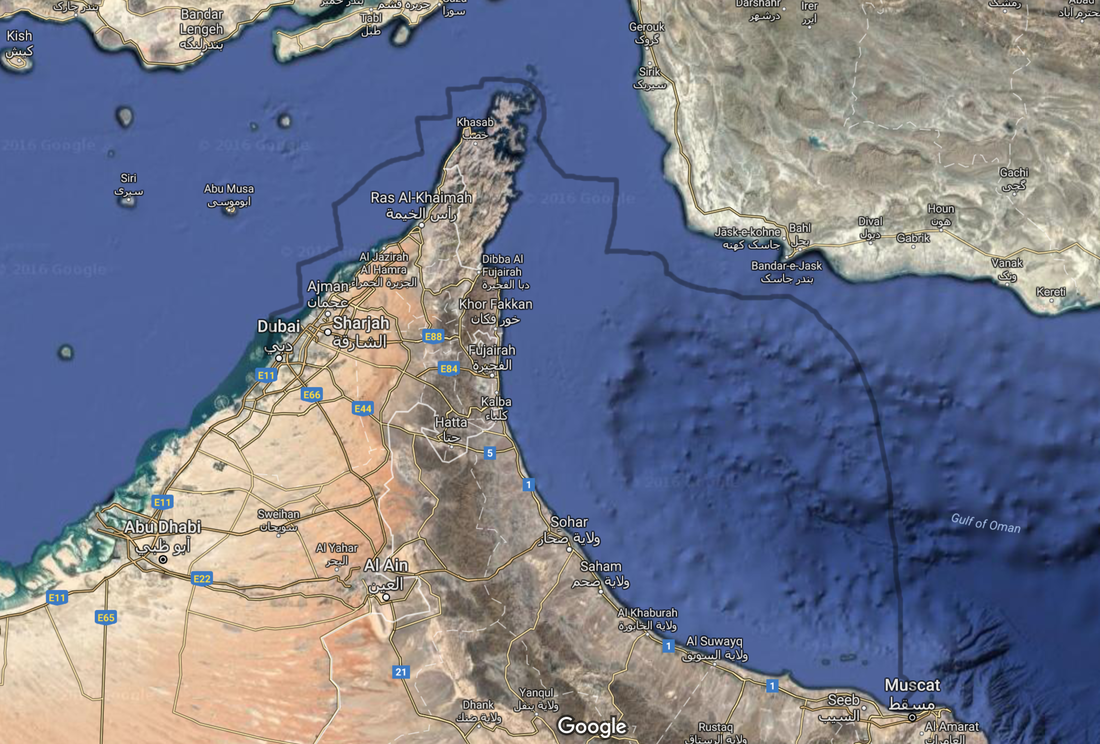 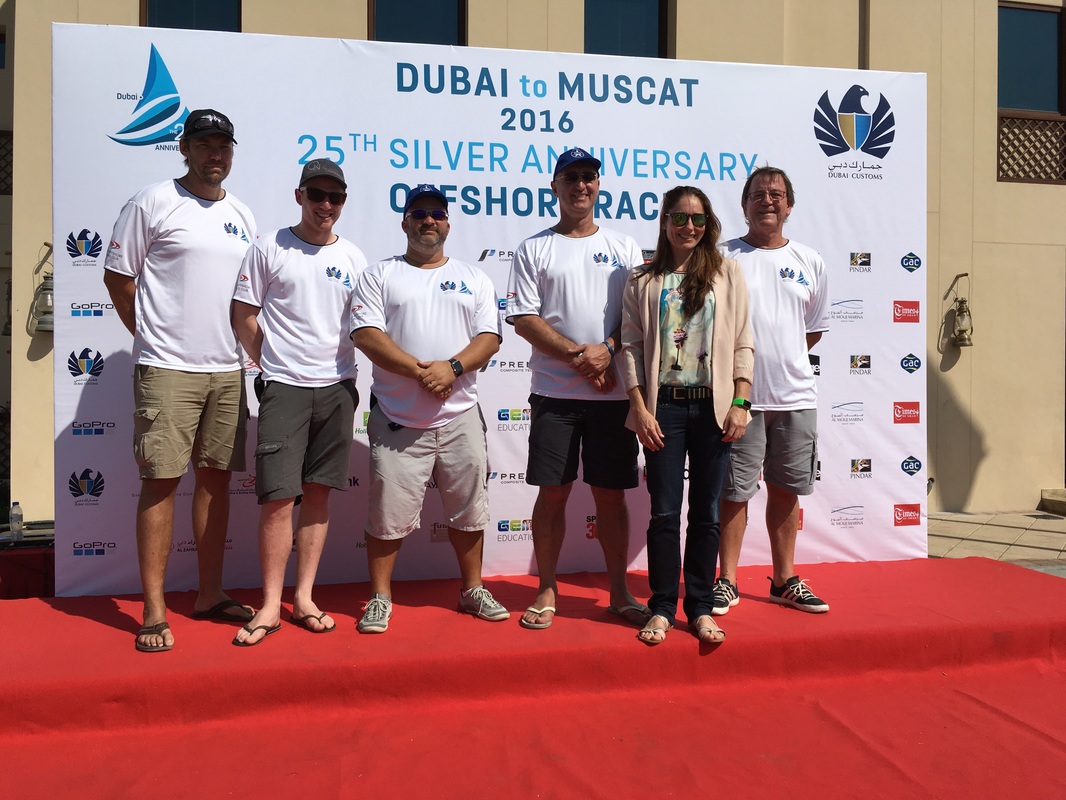 The team (minus Mark Zamaria) from left to right; Chris Coady, Olly Norris, Nate Harris, Francis Carr, Guy Norris (no relation), taken with a representative from clothing sponsor 2XU There were 21 boats entered and we started in a light 7-9knt NE breeze, tacking out past 'The World' and the Deira Palm. As night fell, we were making great progress lying 3rd on the water. The breeze softened but kept us going to reach the Straights of Hormuz and the stunning Musandam peninsula by mid morning on day 2. Then came the big question, continue going North round the top, or shoot the gap between a small island and the mainland. The two boats ahead had gone around the top, but we rolled the dice and went for it. As we passed through the gap, the wind dropped to nothing, and in the confused current caused by the meeting of the Gulf and Indian Ocean we were spat out doing a 360 with no control whatsoever! Then came the first of many long drifts in no wind. Some hours later, we picked up a small breeze and made an attempt to get as close to the Iranian Coast as possible where out forecasts suggested there would be more significant wind. There was an imposed exclusion zone of 12 miles, but with stories of boats being captured and sailors spending 10 years in prison, we were cautiously added a few miles on top. An unlit UAE military helicopter circling the boat at one point certainly added to the atmosphere. As we settled into the rhythm of offshore racing, the next 24 hours provided us with continuous shut downs in the breeze, but the crew coped extremely well remaining focused, driving the boat ad trimming the sails to gain that extra 0.1knt. With the GPS ETA displaying the 4th December, we knew we needed to find some proper breeze so took a decision to head much further east. By this stage we had run out of data on our Satellite Communications, so were sailing blind and had no idea what our competition were doing. Eventually we found a 10knt SE breeze, not exactly from the direction we were expecting, but we were able to point directly at Muscat maintaining in excess of 8knts of boat speed, which was a bizarre feeling after 3 days of close to 0! With a mile to go, we were nearly there, but of course the breeze did a full 180 and dropped to around 2knts, meaning we had to endure nearly an hour of light shifty upwind sailing again, but eventually we crossed the line close to midnight on Sunday after 82 hours at sea. By the morning the results were clear, we had finished 4th out of 21 boats missing the podium by 2 minutes. Rather than disappointment, we could not have been happier for the boats in front of us who had been amazing completion and deserving of their placing. A particular mention goes to the 8 Omani sailors on the Farr 30 Renaissance who had endured the 4 days on a tiny boat with next to no facilities. It was hard to feel bad about our air conditioning failing on day 3! Sailing in the UAE is a hidden gem. The coastlines offer incredible views whether it's the lights of the Dubai skyline, or the Mountains of Oman. The Musandam peninsula is stunning and plans are already in progress to return to this region with the climbing gear to explore the many Norwegian style Fjords. Having experienced the race, and reflecting on some our strategic decisions, I will definitely be back again in search of the podium, as long as the team on Faith will have me again! Check out the photos and video below for some highlights from the race. As autumn approaches in the Northern Hemisphere, it's time to start dreaming about those first turns of the 2016/7 season. True to the Olly Norris Performance Coaching ethos, we want to offer you a different experience this year, whether it be pushing the boundaries of your on-piste performance, making your first turns in powder, reaching your first summit on touring skis, or even picking up a pair of telemark skis. Let's look at the options... Pre Season Training - Zermatt, Switzerland |


| Route Ascent CAS grade Weather | Lift to the Grand Montets, descent to the Glacier d'Argentière, ascent of Col du Passon, traverse of Glacier du Tour, ascent of Col Superieur du Tour, descent of glacier to Trient to Cabane du Trient 1100m AD Clear |
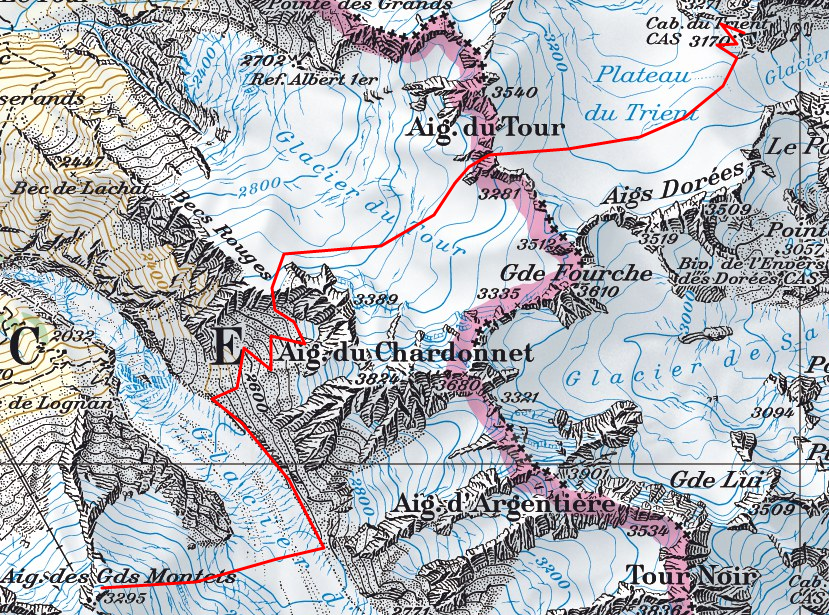
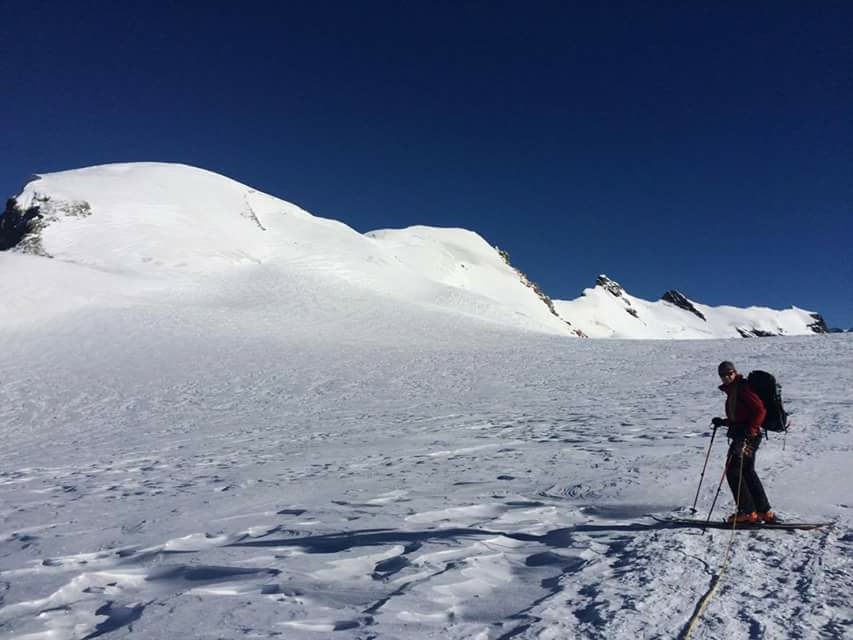
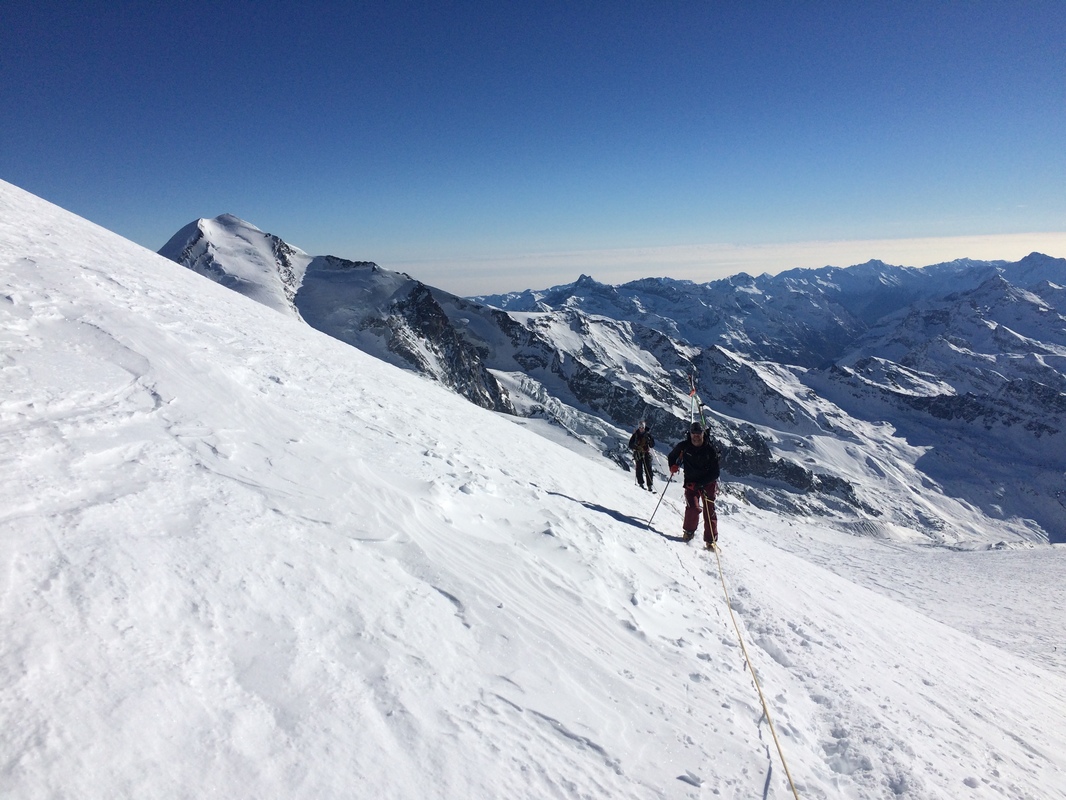
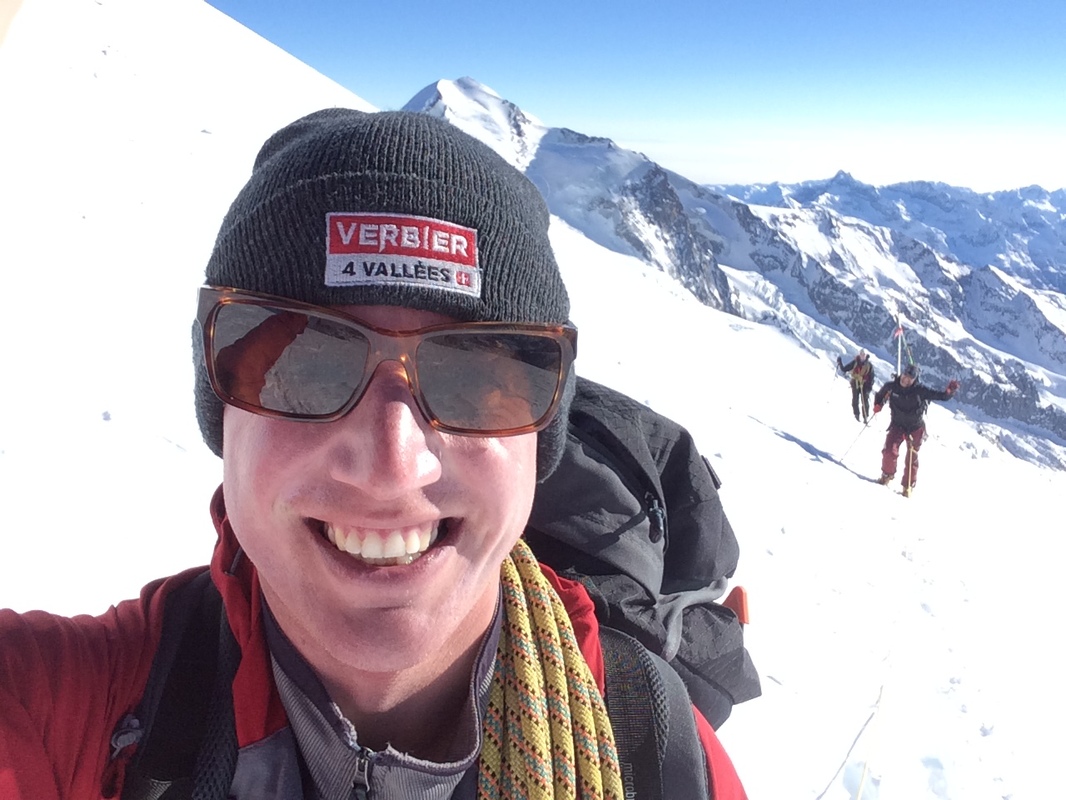
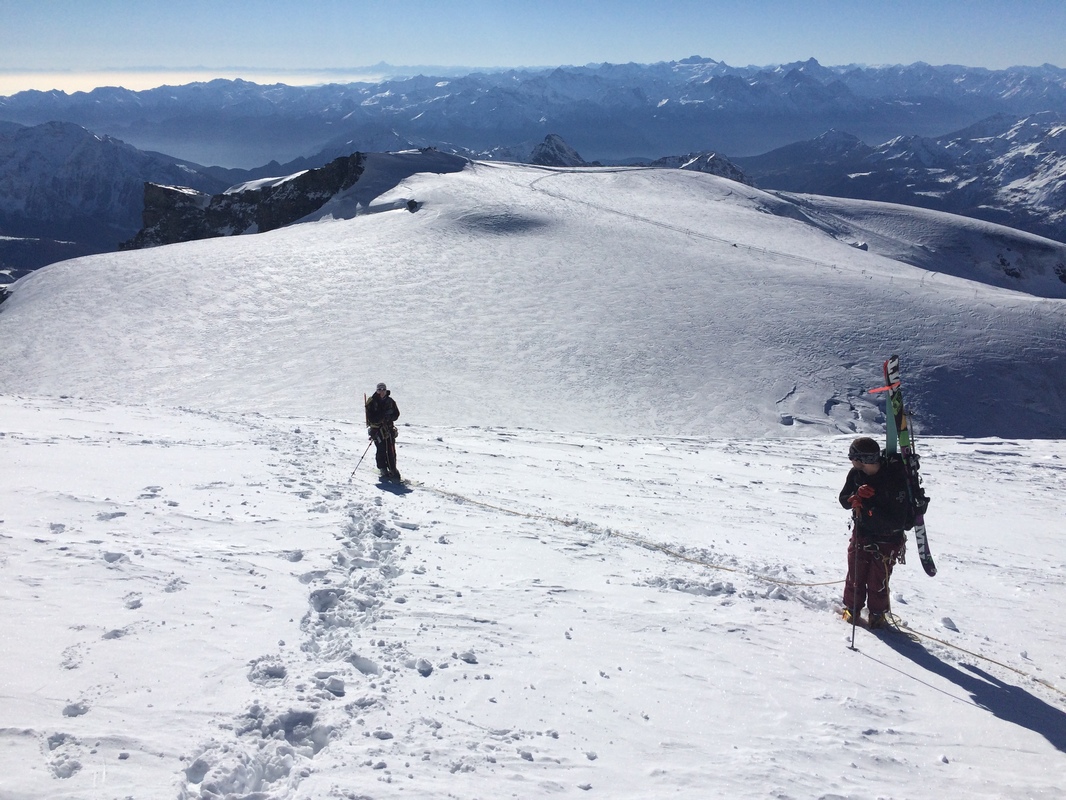
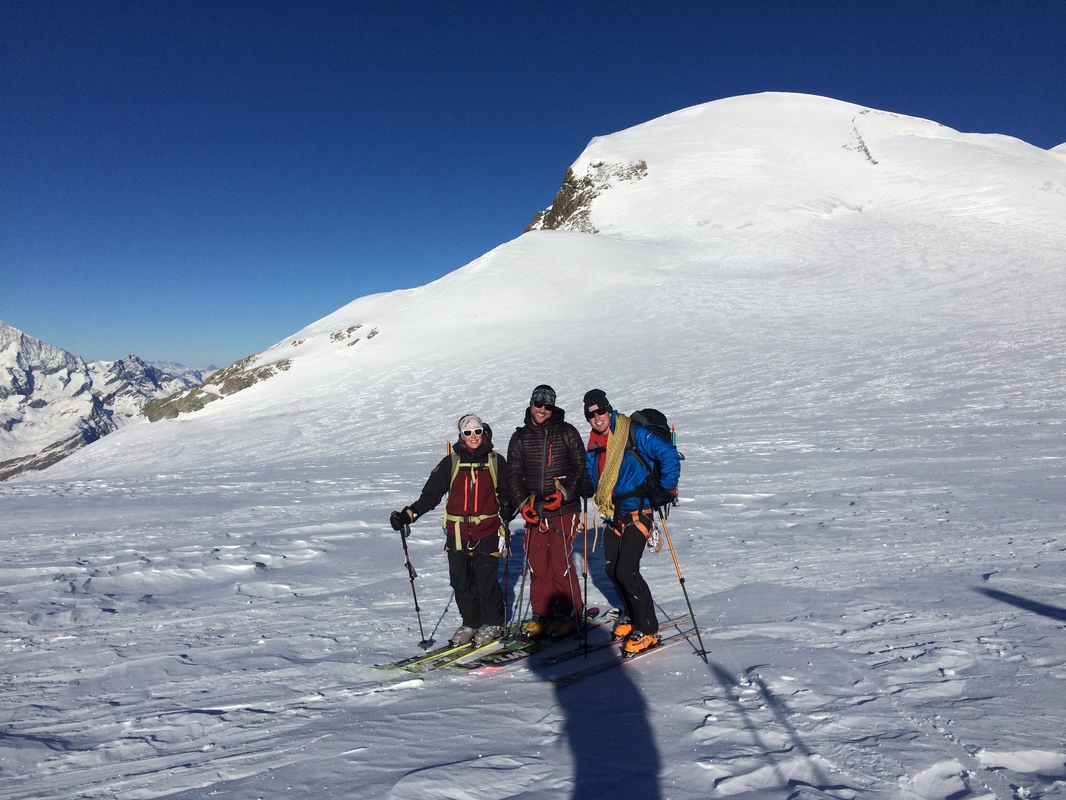
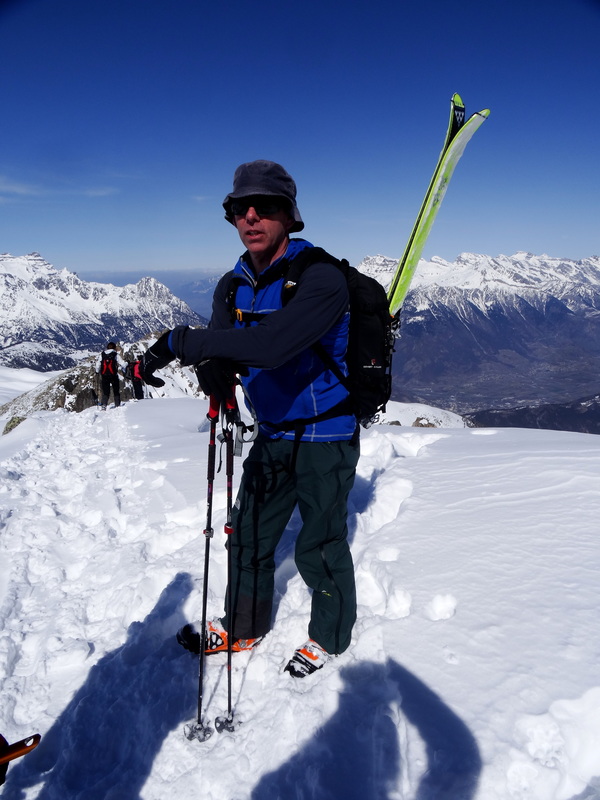
Our trip started from Crans Montana, where we hit the road at 0500, direction Chamonix. We had time for a quick last coffee in civilisation before taking the first lift up to Les Grands Montets above the Argentière glacier. We performed a check of our avalanche transceivers, put on our harnesses and crevasse rescue gear, before ducking under the rope out onto the Glacier d'Argentière. After many days of preparation, it was a relief to be finally underway! It was a nice relaxed ski down to get the legs going before our first ascent up the Col du Passon.
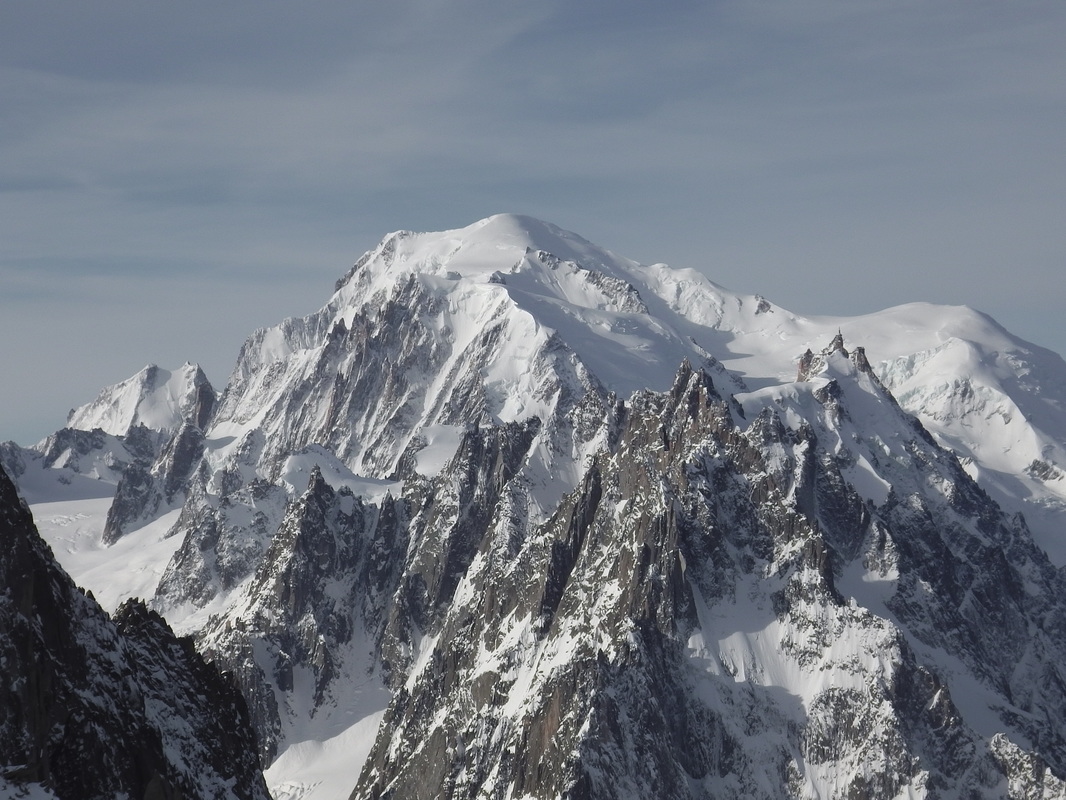
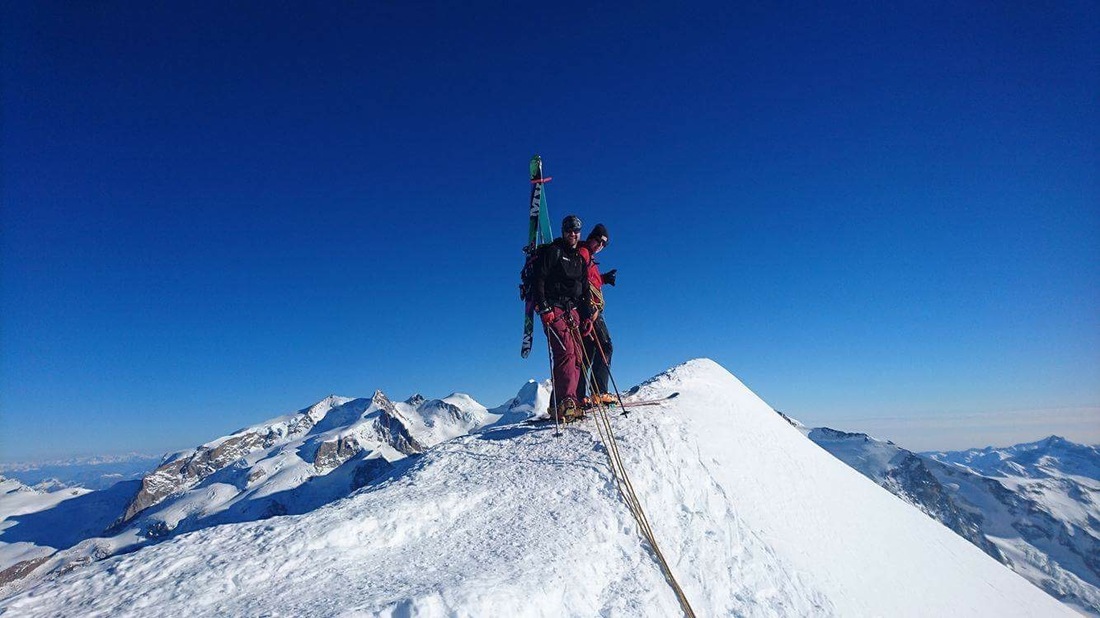
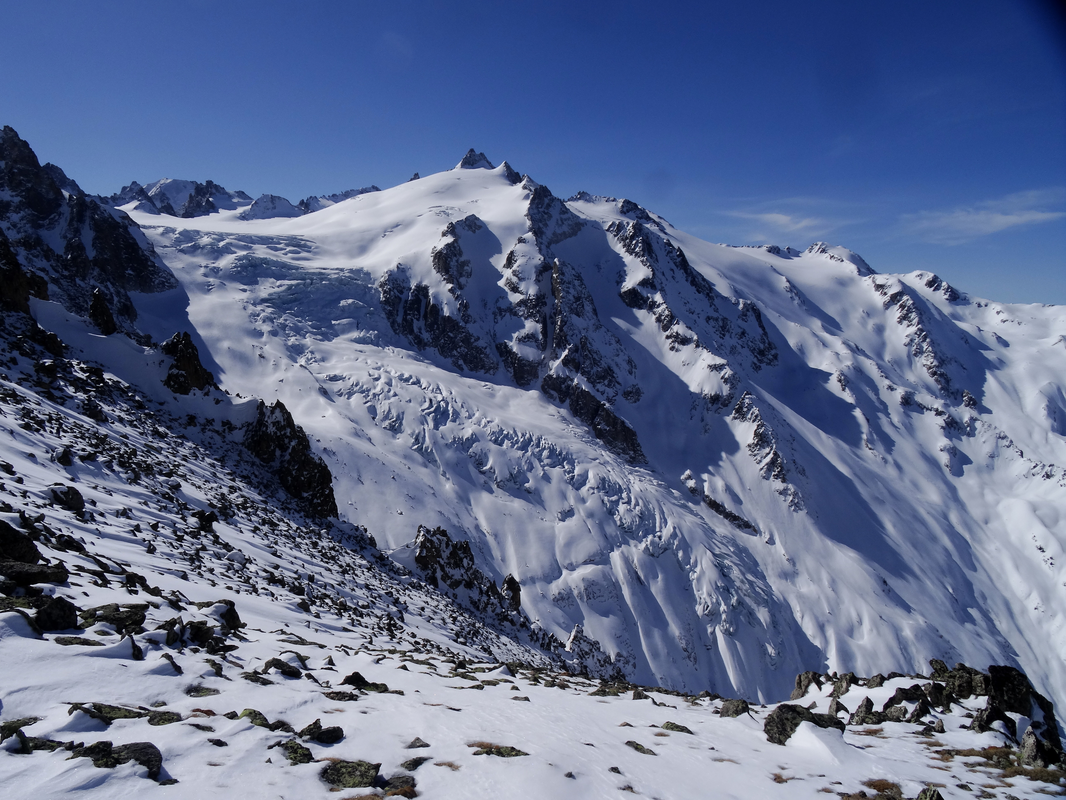
Mont Blanc 4,807m
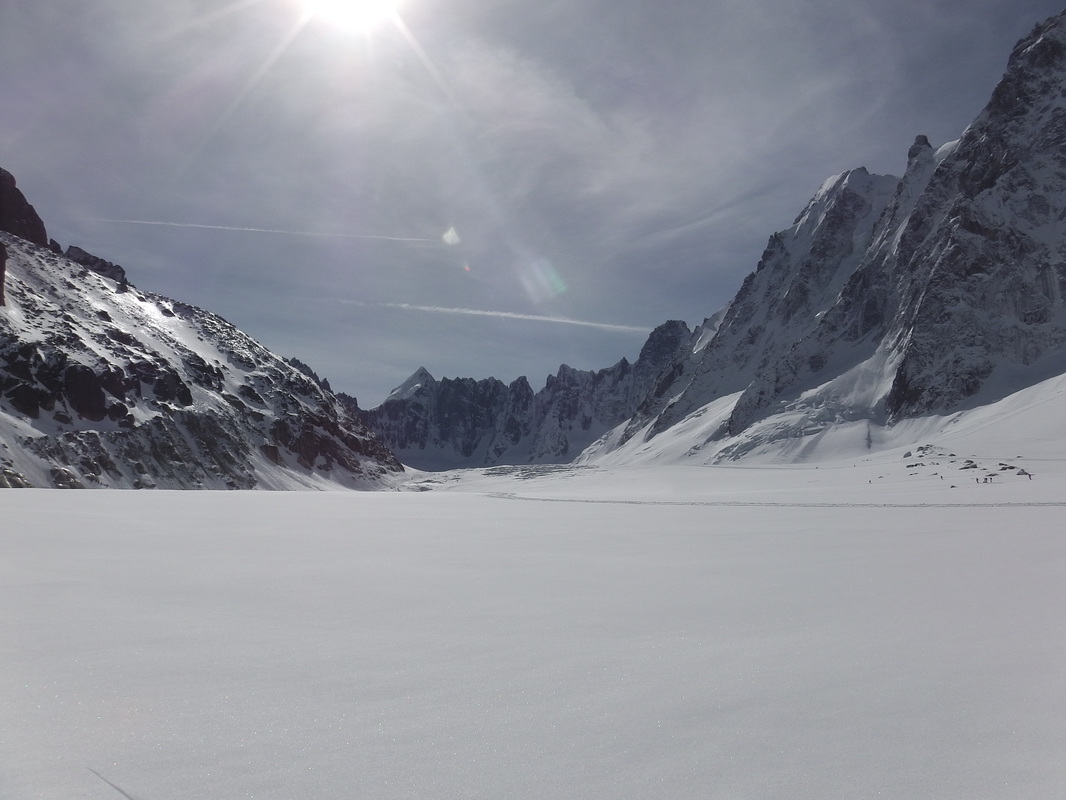
Glacier d'Argentière
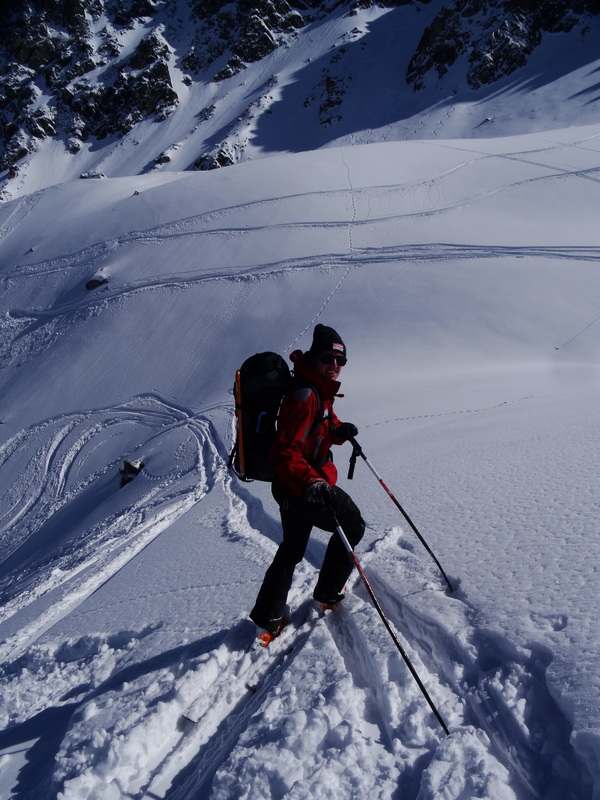
Tom reaches the top of Col du Passon (3028m)
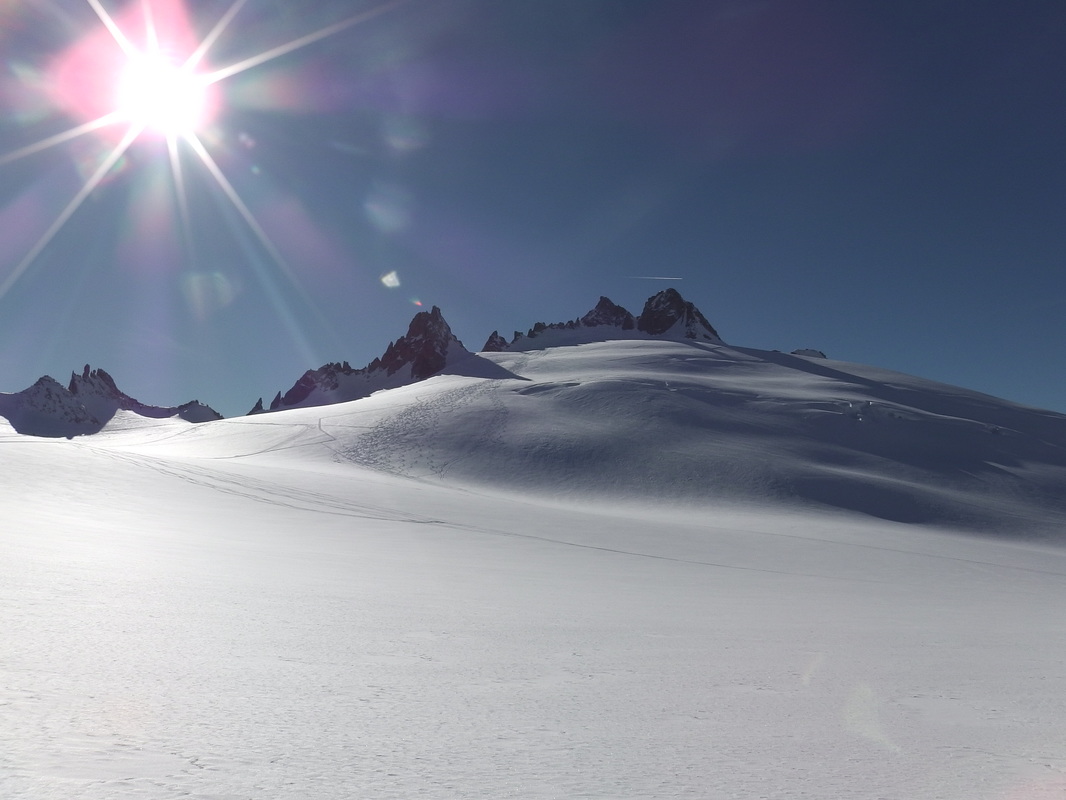
Glacier du Trient by day
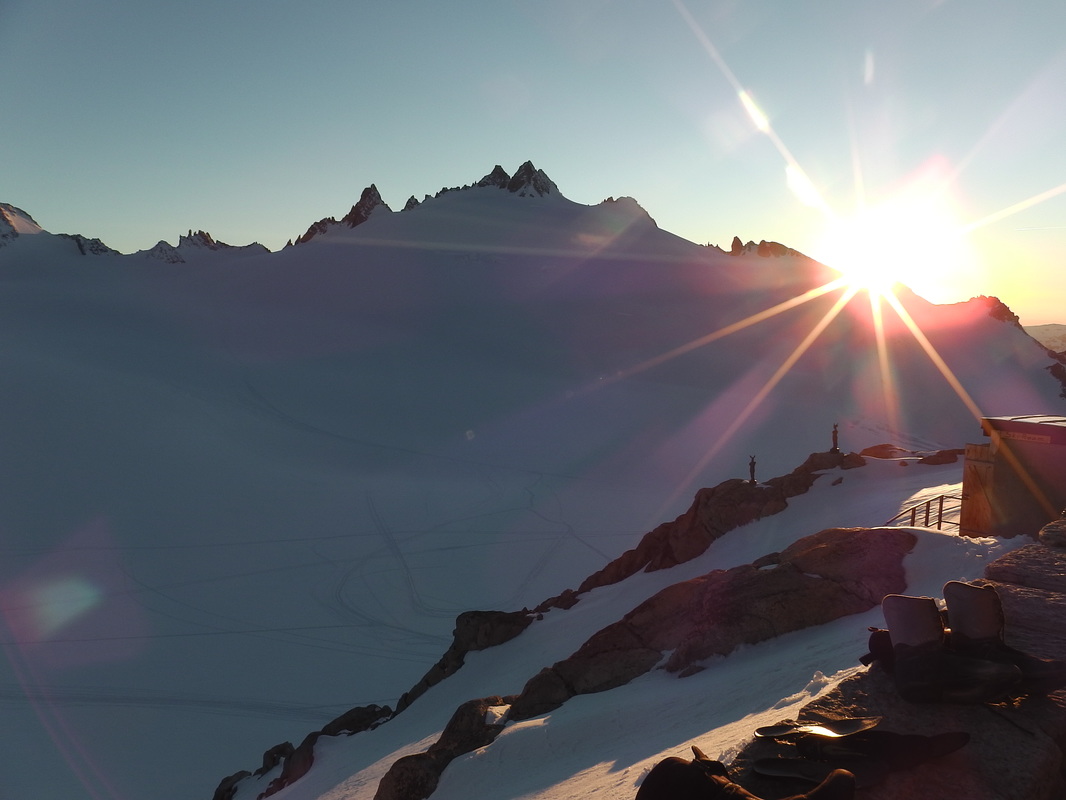
Day turns to night at Cabane du Trient (3,170m)
Day 2 - Cabane du Trient to Cabane Mont Fort
| Route Ascent CAS grade Weather | Descent of the Glacier du Trient, ascent of the Col des Ecandies, descent of the Val d'Arpete to Champex, bus/train to Le Châble, lift to Col des Gentianes, descent to Cabane Mont Fort 46m AD- Clear |
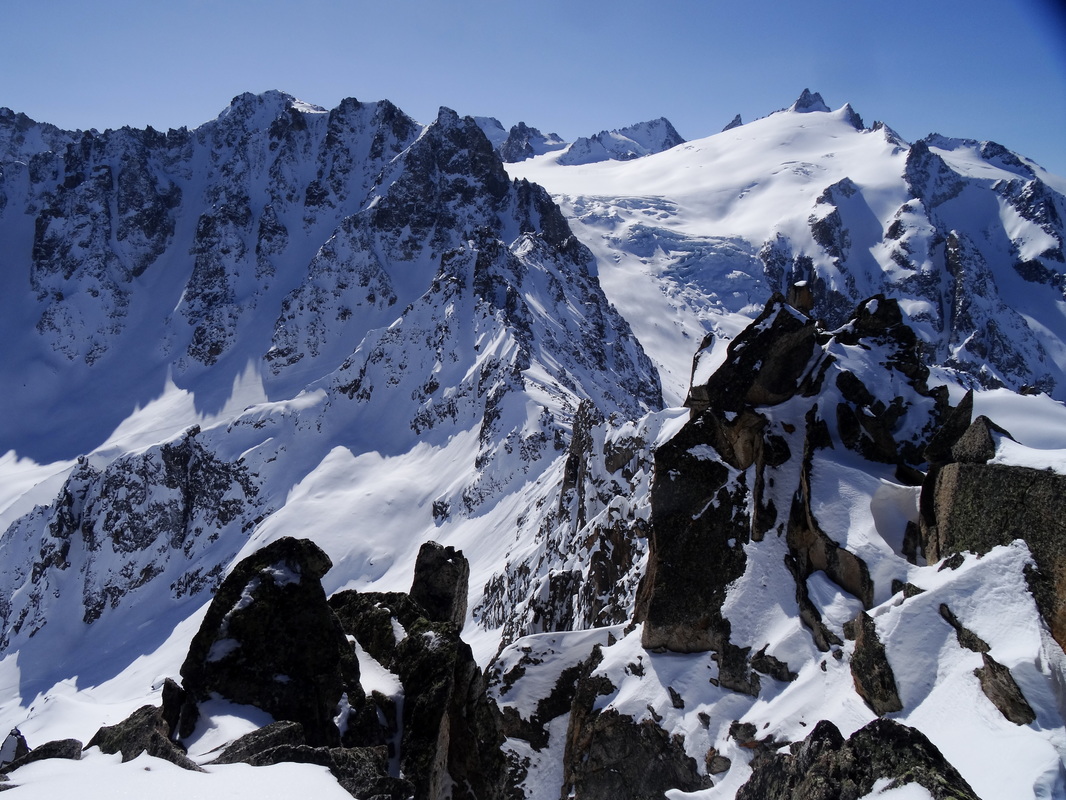
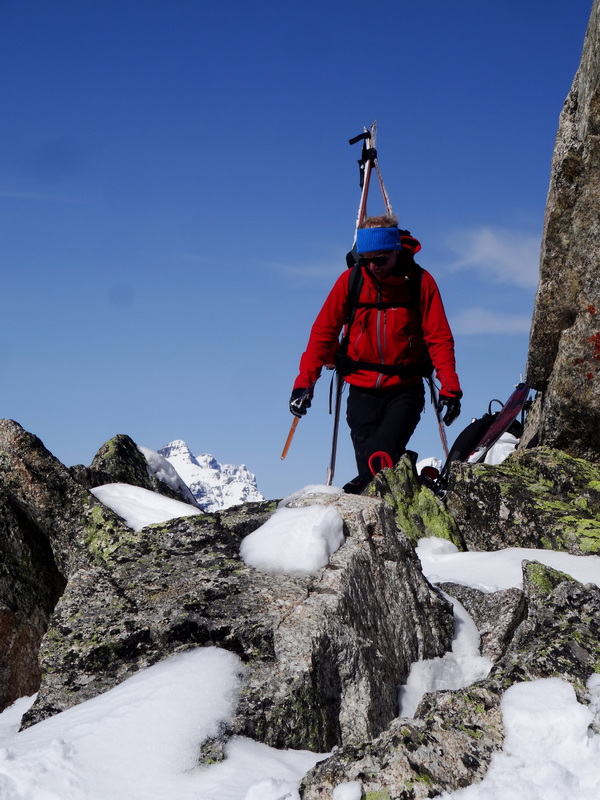
Leaving the Cabane du Trient at 0800, we descended the Glacier du Trient before climbing the Col des Ecandies, a steep couloir of mixed snow and rock, to reach the descent down the Val d'Arpete to Champex. From here we used a combination of bus/train/ski lift to reach Cabane Mont Fort.
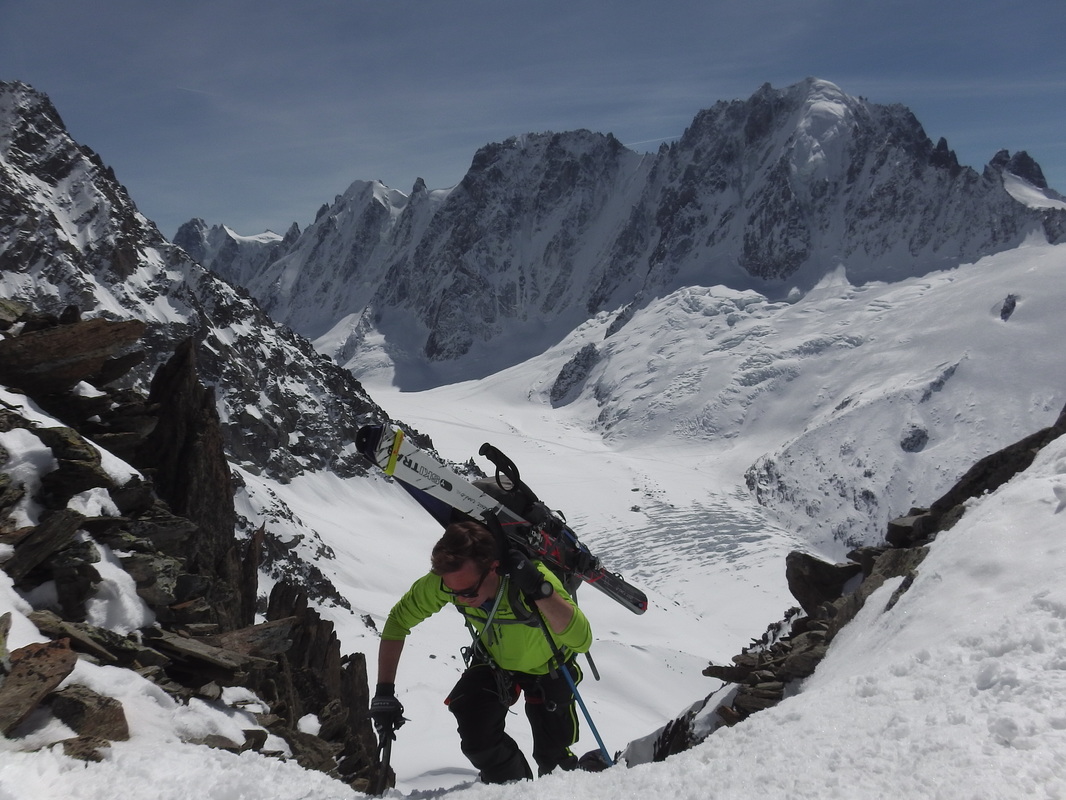
Olly climbing to the top of the Col des Ecandies
Day 3 - Cabane Mont Fort to Cabane des Dix
| Route Ascent CAS grade Weather | Col de la Chaux, Col de Momin, Col de Cleuson, Col du Sovereu, pas du chat 1533 AD Clear |
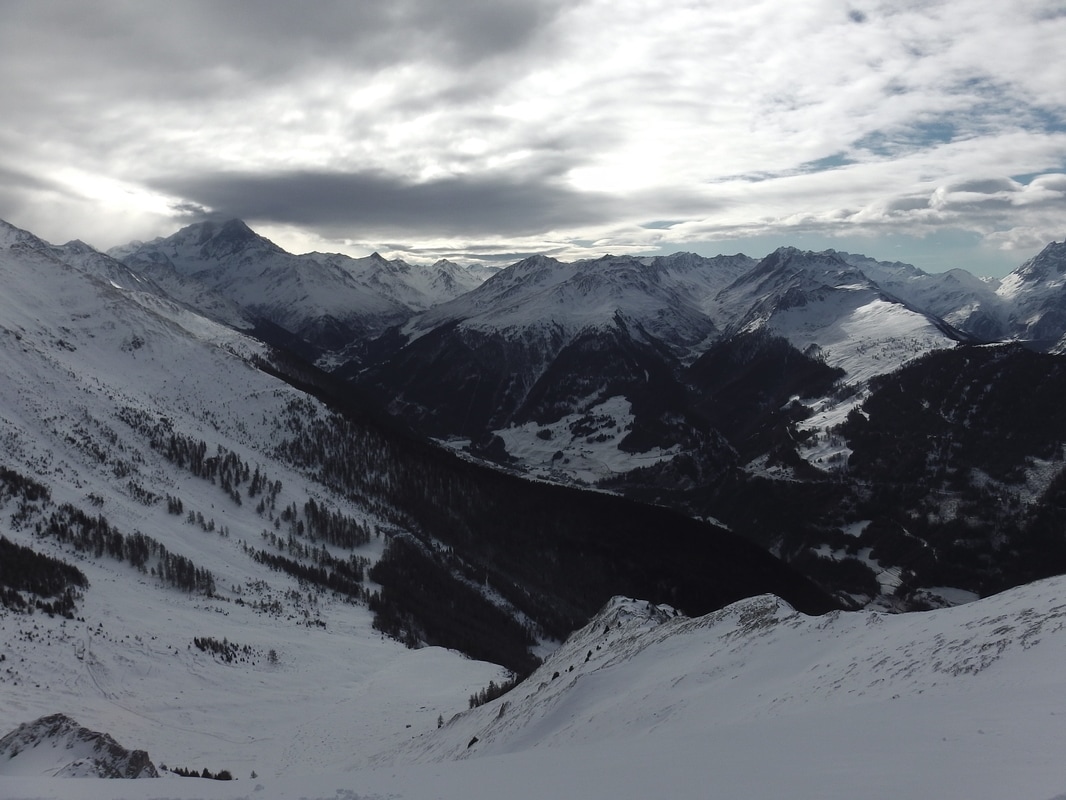
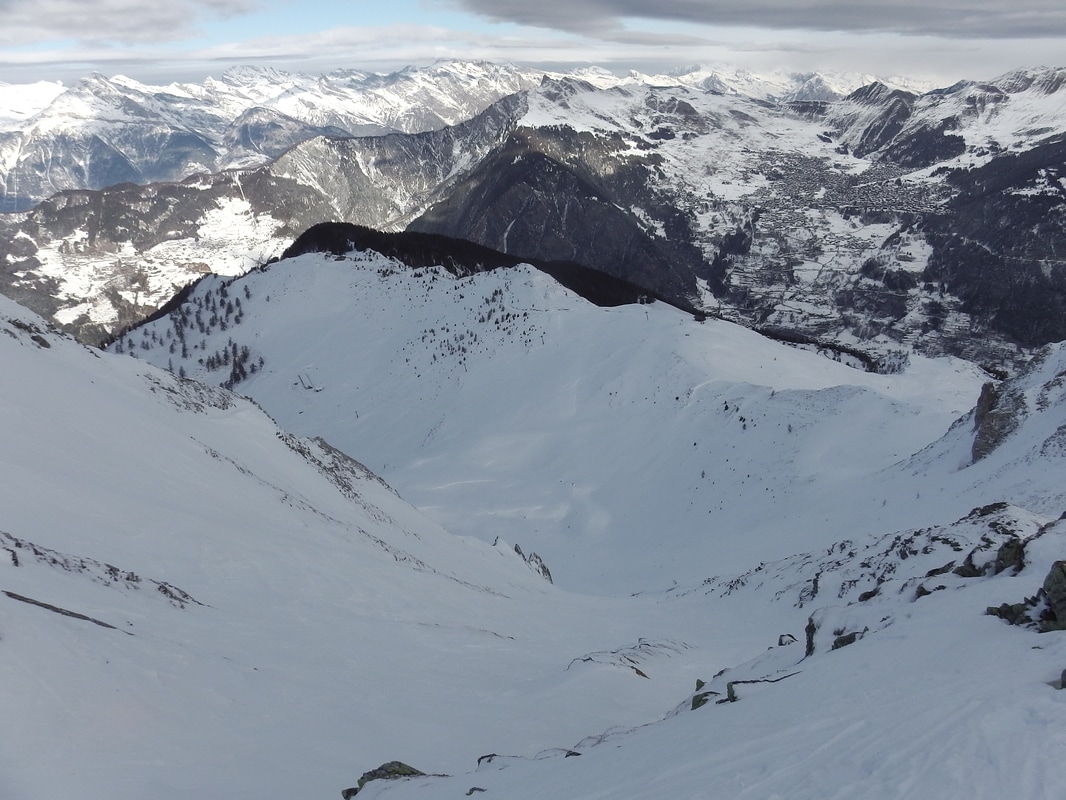
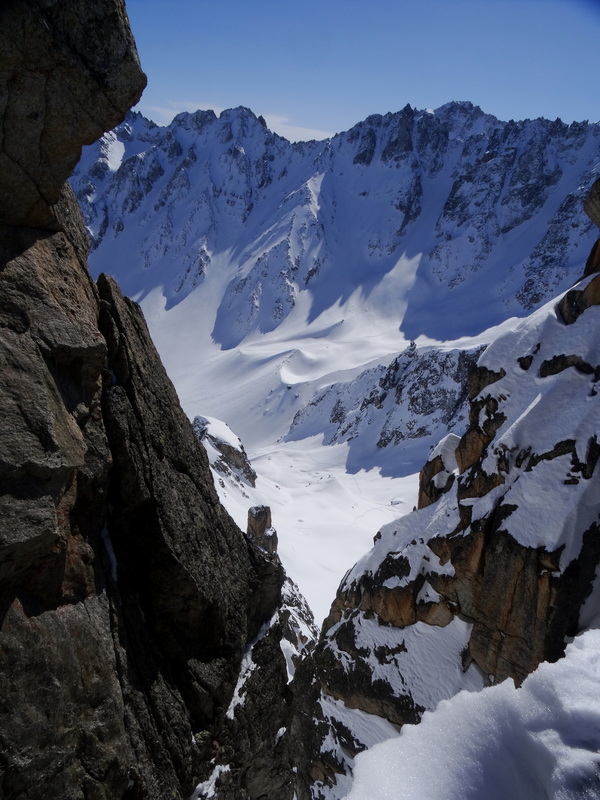
Fortunately day 2 was an easy one, because day 3 was somewhat of an epic. Departing Cabane Mont Fort at 0445, we made our way up to Col de La Chaux, a route I have followed many times on the way to La Rosablanche, but today once we had reached Col de Momin, we instead headed for Col de Cleuson, which opened up into a steep and exposed 40 degree descent, before ascending the Col du Sovereu. We then enjoyed a glorious descent to Lac des Dix, and then contoured around to Pas du Chat before the final climb to Cabane des Dix.
The final ascent to Cabane des Dix with Mont Blanc du Cheilon in full view
Day 4 - Cabane des Dix to Cabane des Vignettes
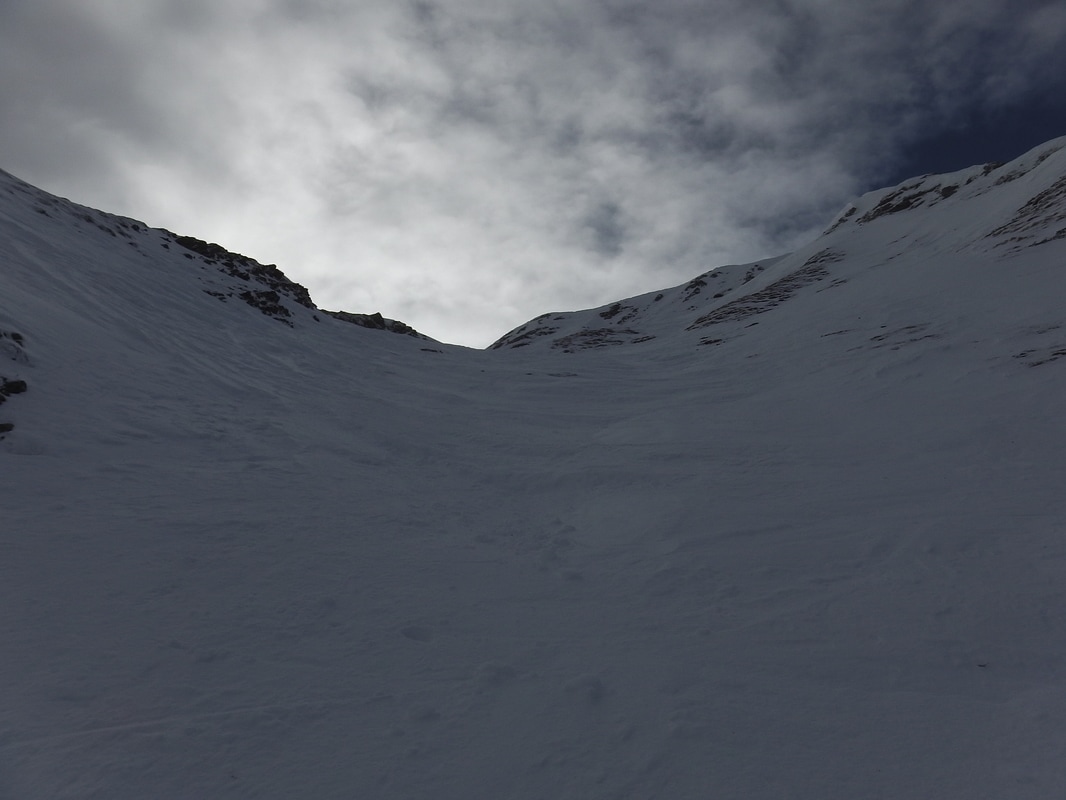
| Route Ascent CAS grade Weather | Pas de Chères, Haut Glacier d'Arolla 810m PD+ Very cloudy with light precipitation, and high winds |
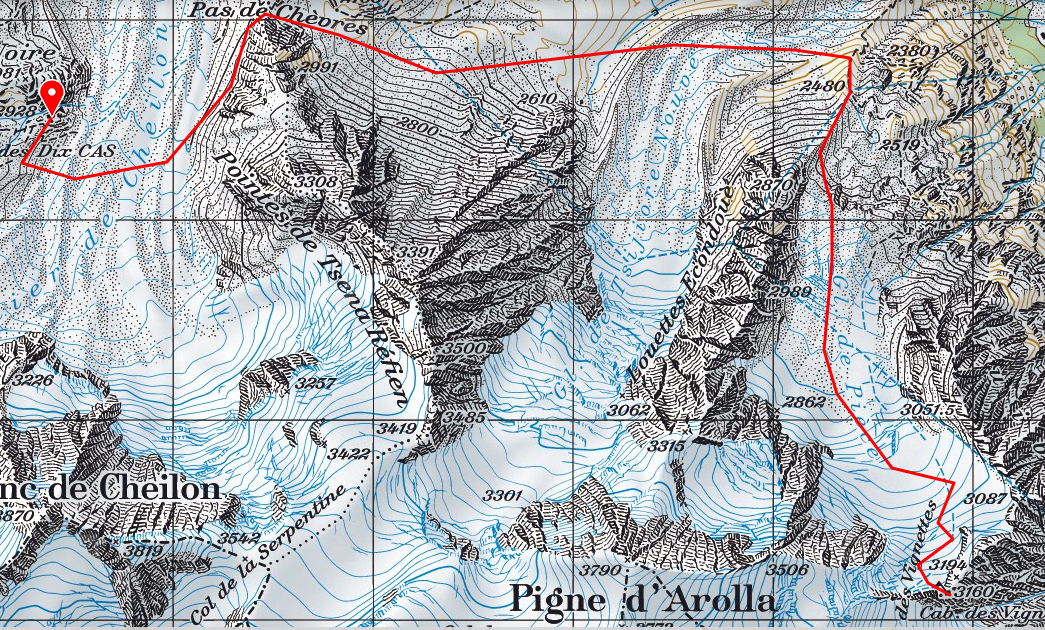
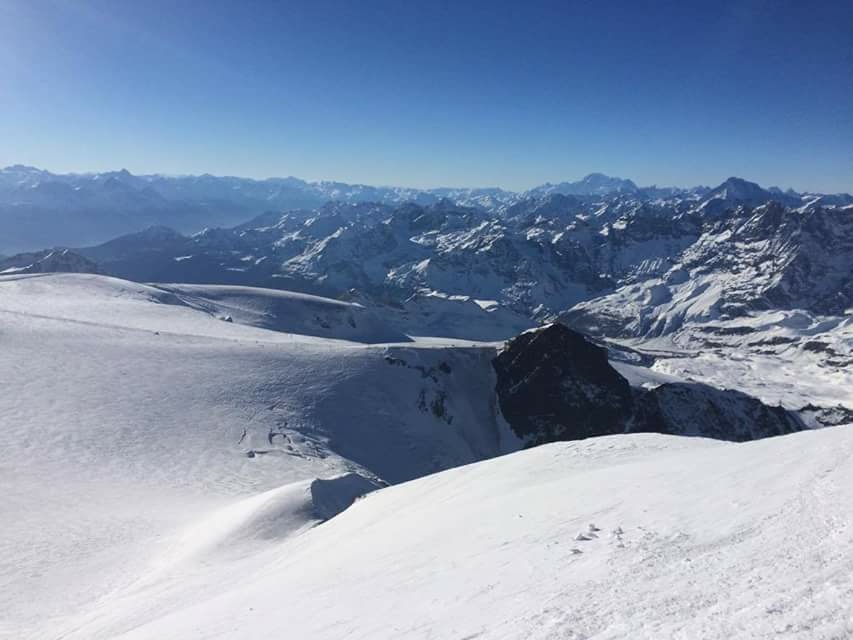
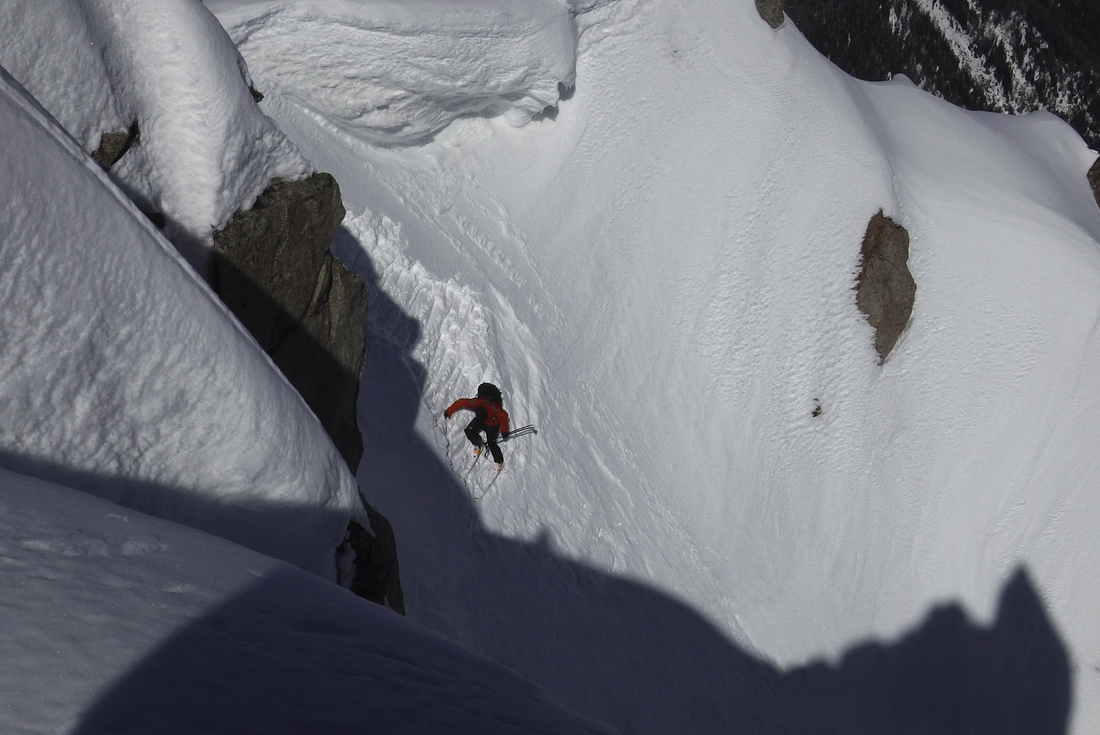
One of the hardest aspects of the Haute Route is that over such a long period, your chances of perfect weather are indeed very slim. We knew this was a risk, and as we arrived at Cabane des Dix the night before, the wind had picked up, and we could see high alto-stratus cloud formations indicating that bad weather was inbound! Our plan had been to summit the Pigne d'Arolla en route to Cabane des Vignettes, but when we woke up, the mountain was shrouded in thick clouds and high winds. We thus took the conservative decision, to take a lower route via Pas de Chèvres towards Arolla, before climbing the Haut Glacier d'Arolla to the Cabane des Vignettes. The weather continued to worsen throughout the day, and we arrived at the cabane in limited visibilty. The storm was here in full strength, but we knew that if it cleared in the morning, we were in with a chance of completing the last, and most technical phase to Zermatt.
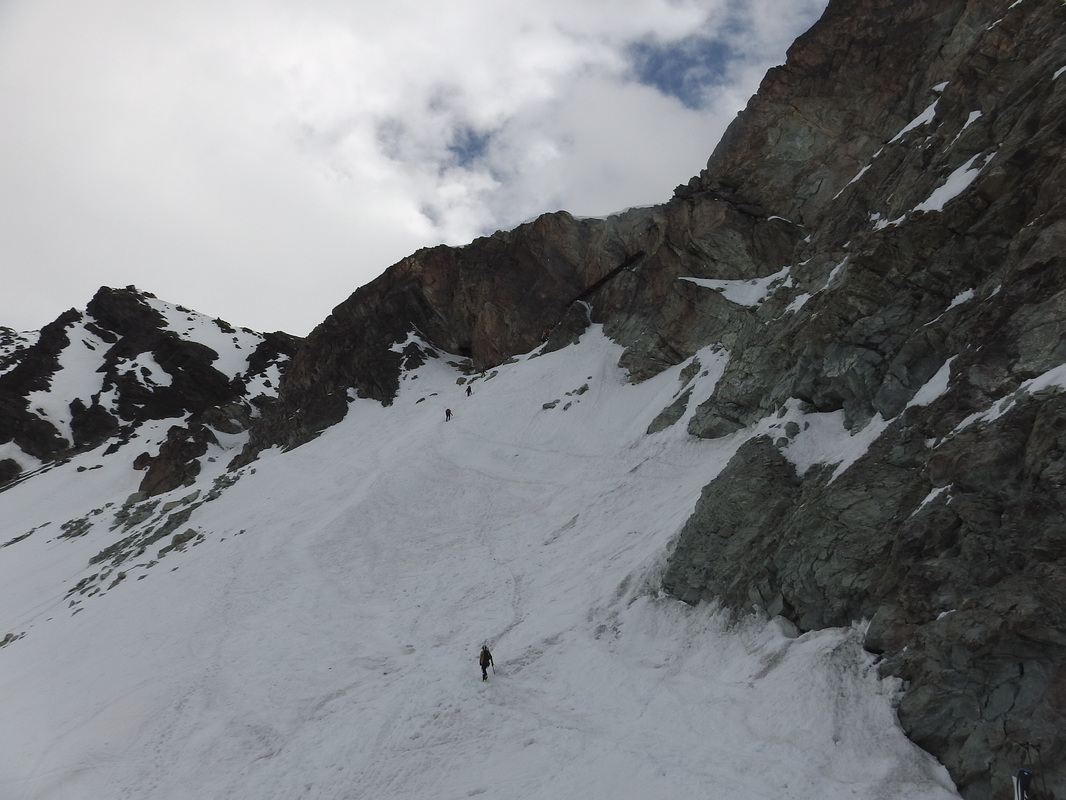
Preparing to climb Pas de Chèvres, visible in the background
Day 5 - Cabane des Vignettes to Zermatt
| Route Ascent CAS grade Weather | Cabane des Vignettes, Col de l'Evêque, col du Mont Brulé, Col de Valpelline 1500 AD- Initially poor before improving to clear |
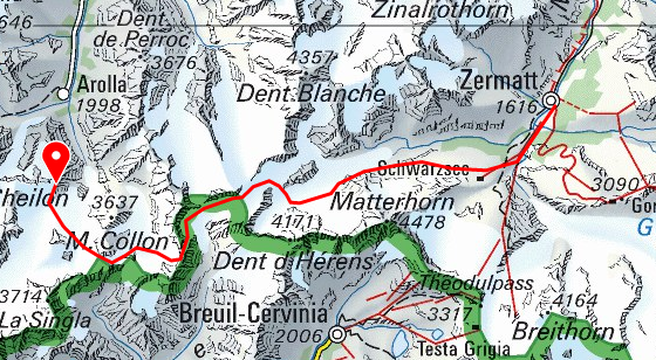
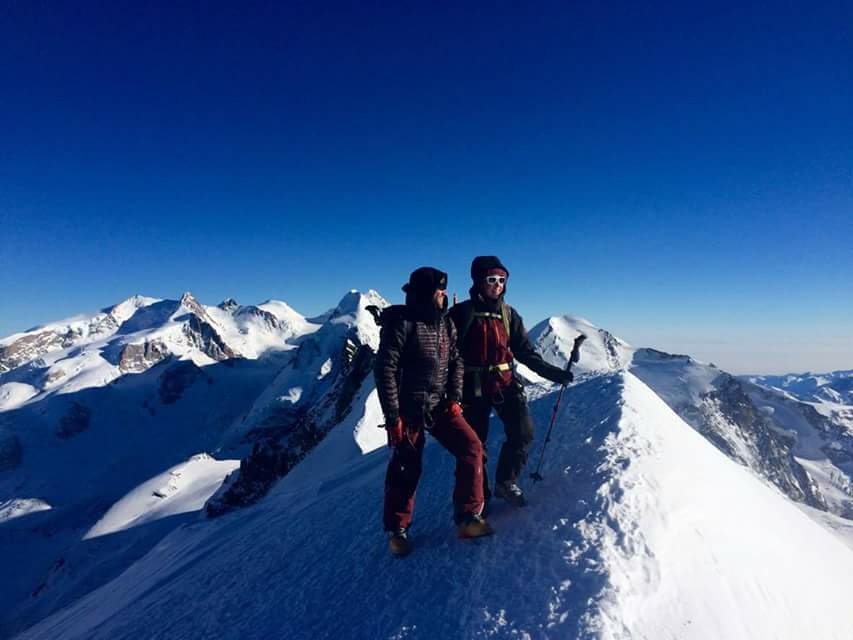
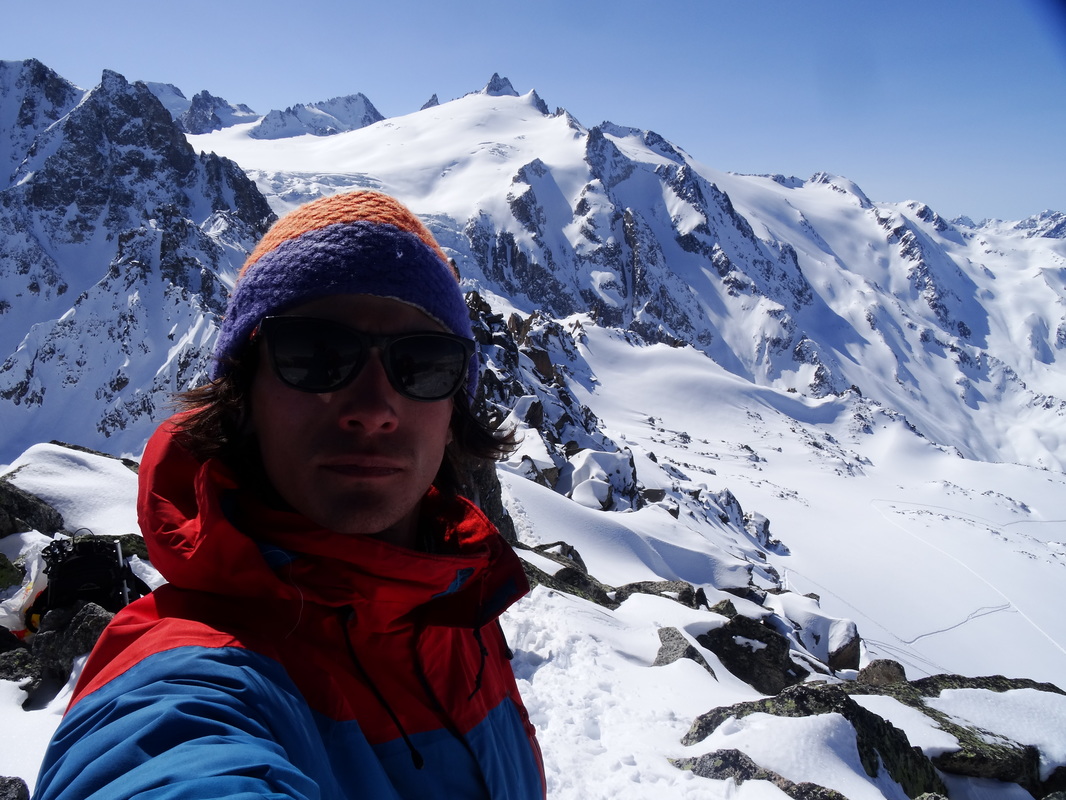
After another sleepless night, partly a cause of the excitement of the final stage, but mostly as a result of the multitude of snorers in our dormitory, I opened the window praying for good weather. Unfortunately I could barely see past the end of my nose. Over breakfast we looked at the options. We knew if we started too late, we couldn't make it in time, so we decided to leave in the bad visibility, hoping that conditions would improve before the final extremely technical descent into Zermatt which requires weaving through crevasses, which we absolutely had to have good visibility for. As we completed the final checks, we were somewhat comforted to see a guided group leave at the same time. We followed them initally out of the hut, but after the first descent we found ourseleves on the front once again, cutting the first track up towards the first of three cols, Col de l'Evêque. The first descent was in the fog still, but by the second col, Col du Mont Brulé, the weather cleared up, and the rest of the stage was completed with ease, descending the stunning glacier into Zermatt.

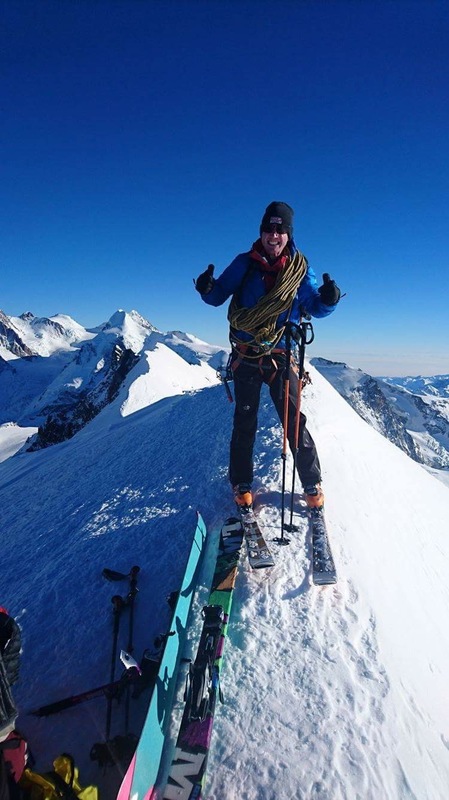
Olly laying the first track on an untouched glacier
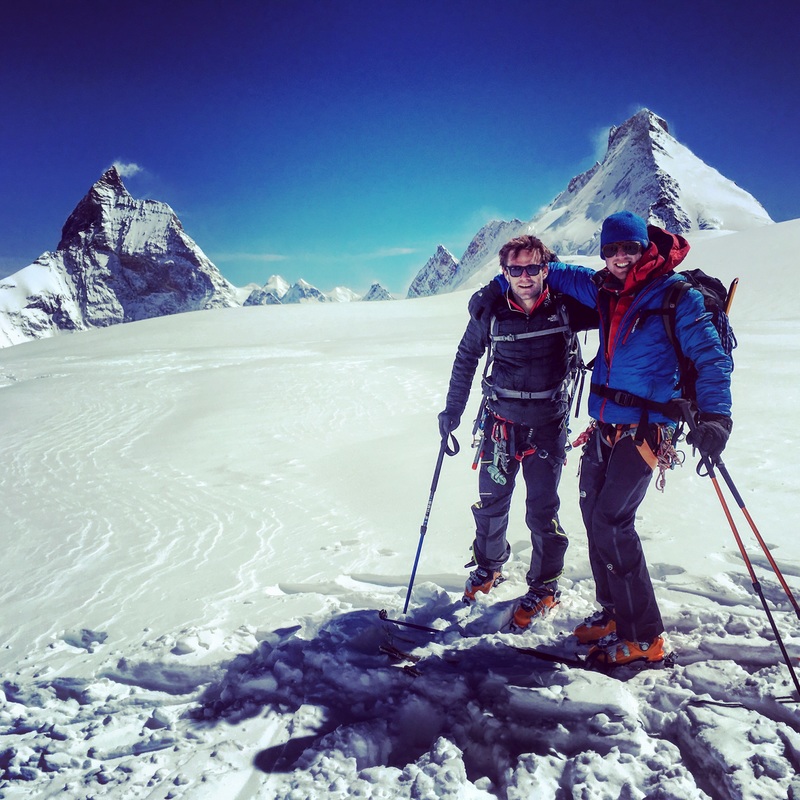
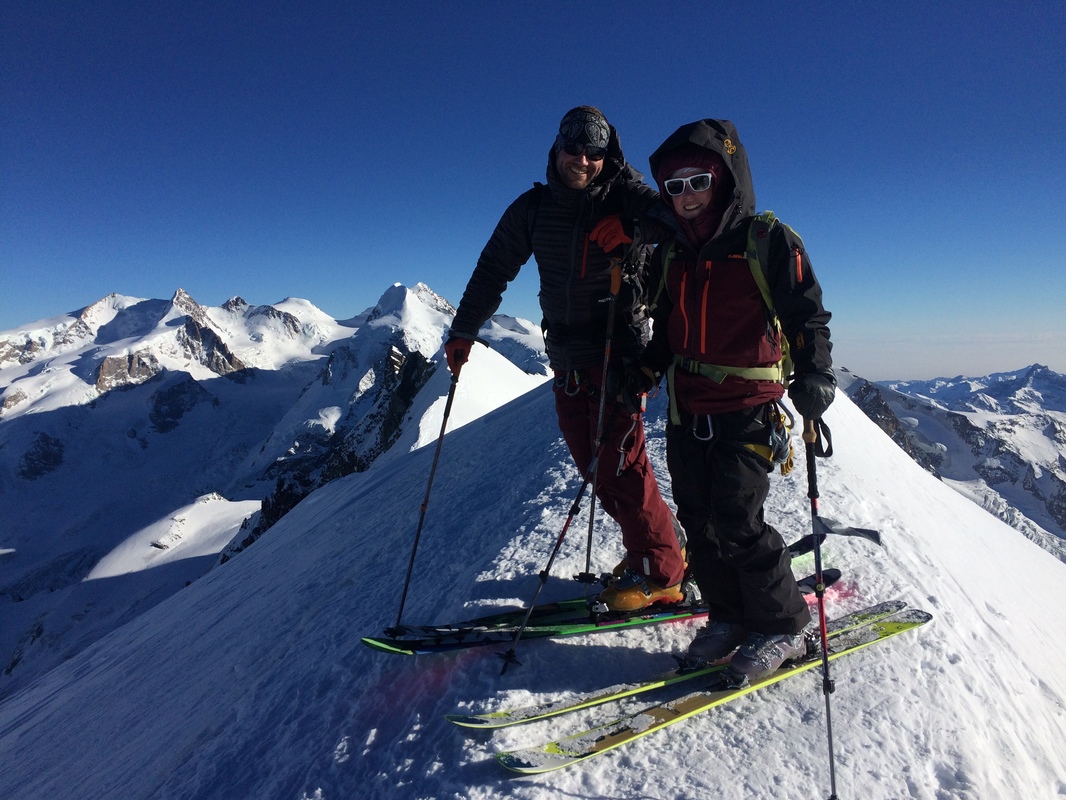
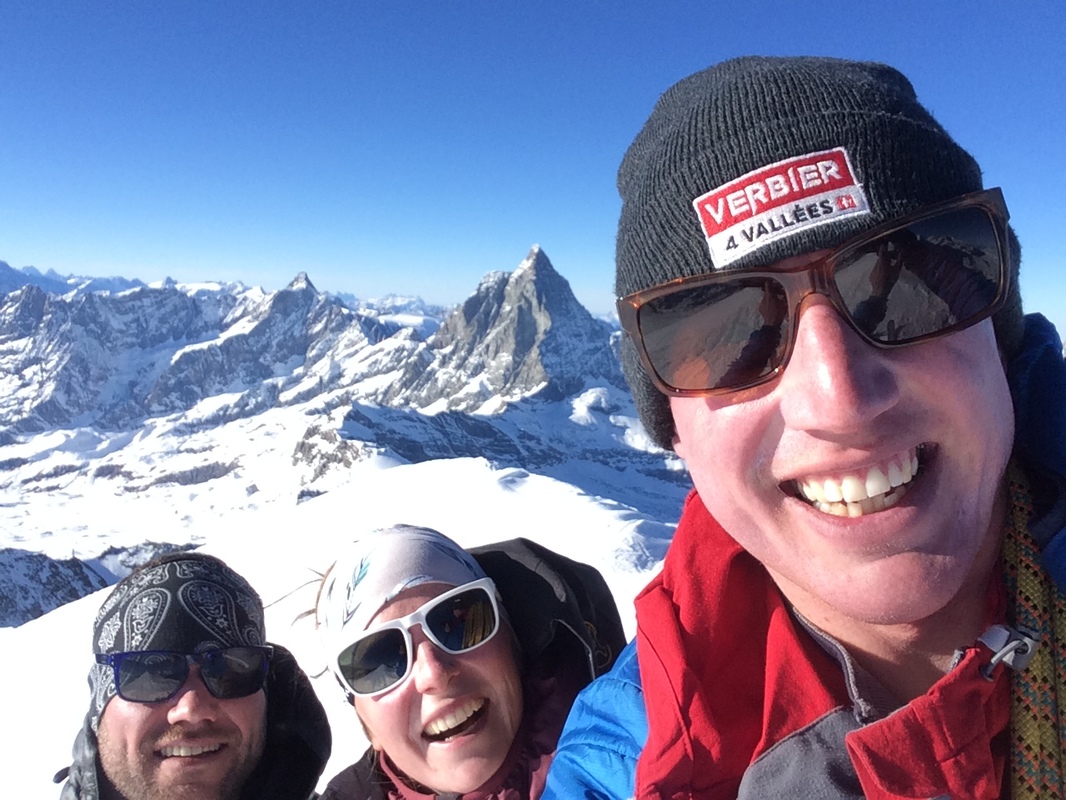
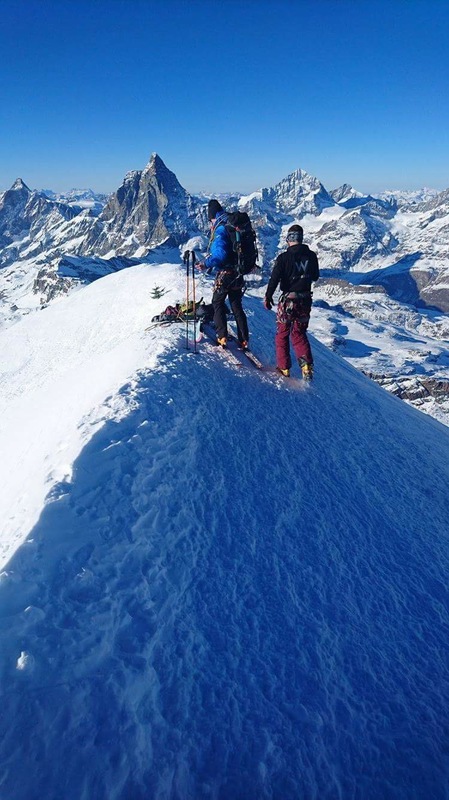
At the top of the last col, with the Matterhorn and the Dent d'Hérens in the background
Avoiding one of the many crevasses in the shadow of the iconic Matterhorn
It's impossible to know how to sum up this trip. The Haute Route is world renowned for a reason. It is an epic adventure through beautiful scenery regardless of snow conditions. It is not the trip to undertake in the search of perfect skiing, but one for a guaranteed adventure. Nonetheless we were fortunate enough to ski powder along the way.
We took on this mission as a group of two, but were far from alone. The ski touring community is a huge family, and you cross paths with people regularly who have the same interests and passions. We are so grateful for the experiences we shared with others, from conversations over dinner in the huts, to debates over route planning and weather. This trip would not have been the same without the fellow ski tourers, hut guardians, and guides that we met along the way.
For more information on the Chamonix-Zermatt Haute Route, other skiing touring trips, or multi day adventures, please do not hesitate to get in touch...
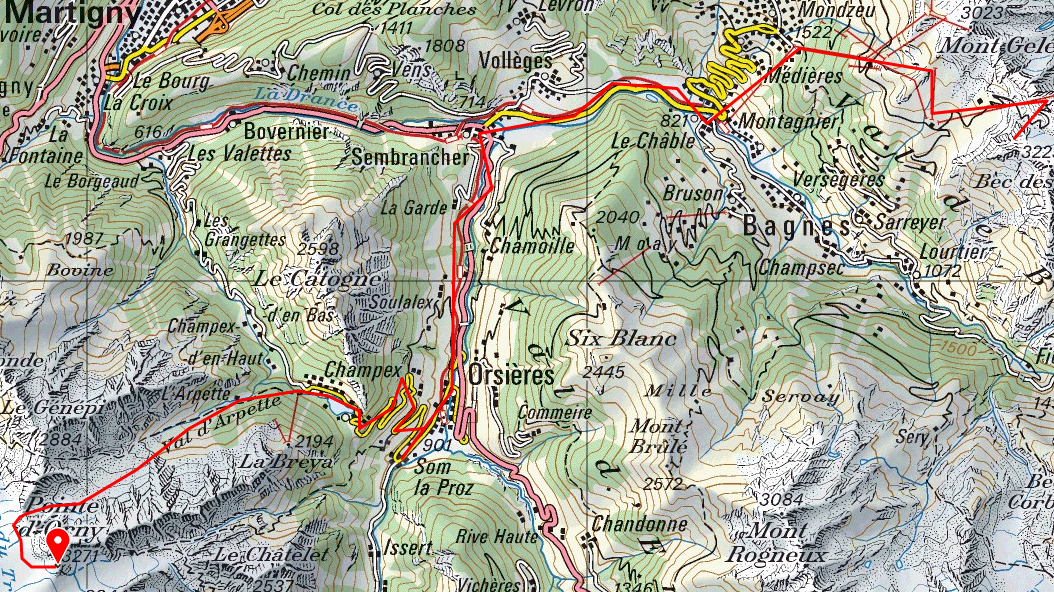
| Group Members Min/max altitude Elevation gain/loss Main facing Route type Duration CAS grade Maps | Olly Norris, Pierre Wolnik, Marty Adams 1275m/2884m +1609m/-1609m N Return trip 6h D- 1325 Sembrancher, 1345 Orsières |
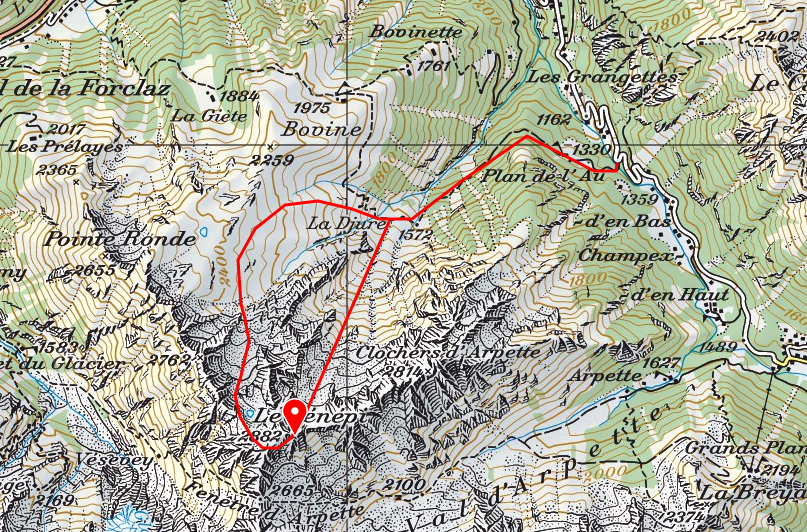
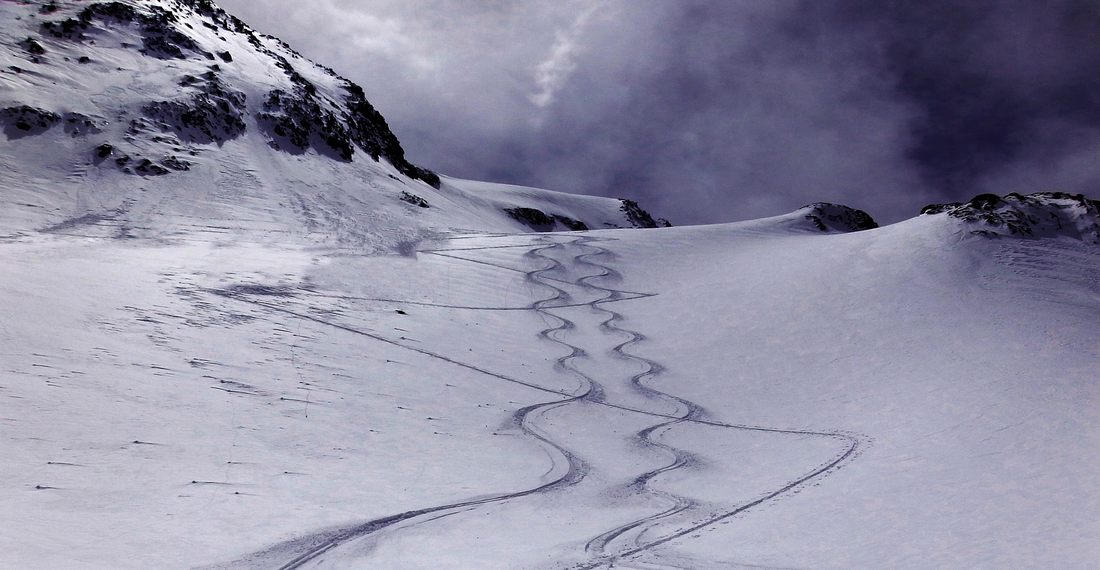
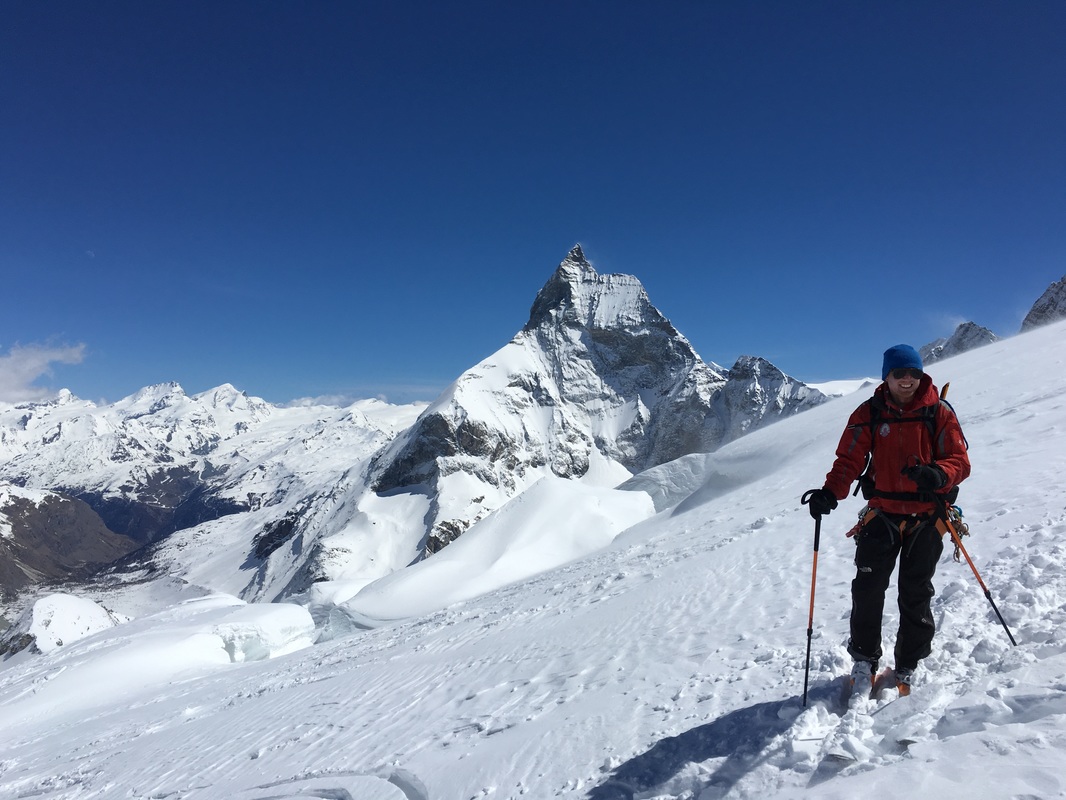
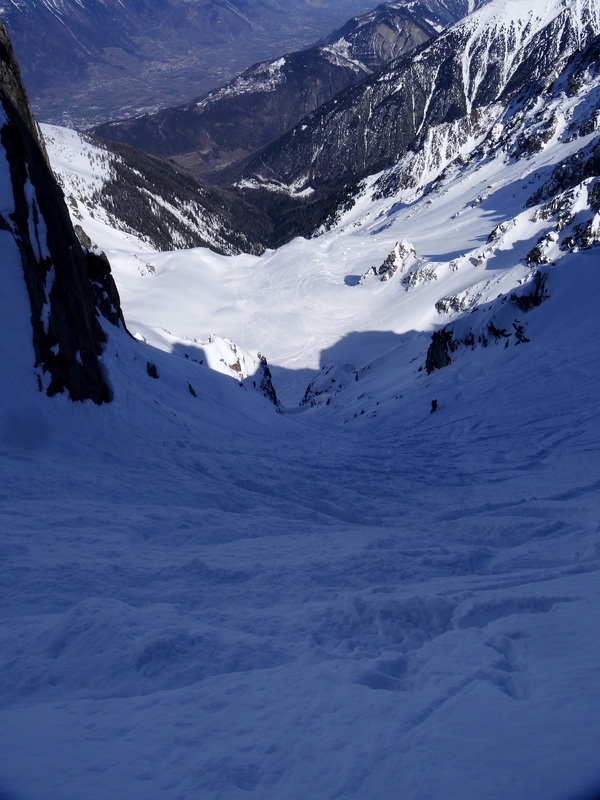
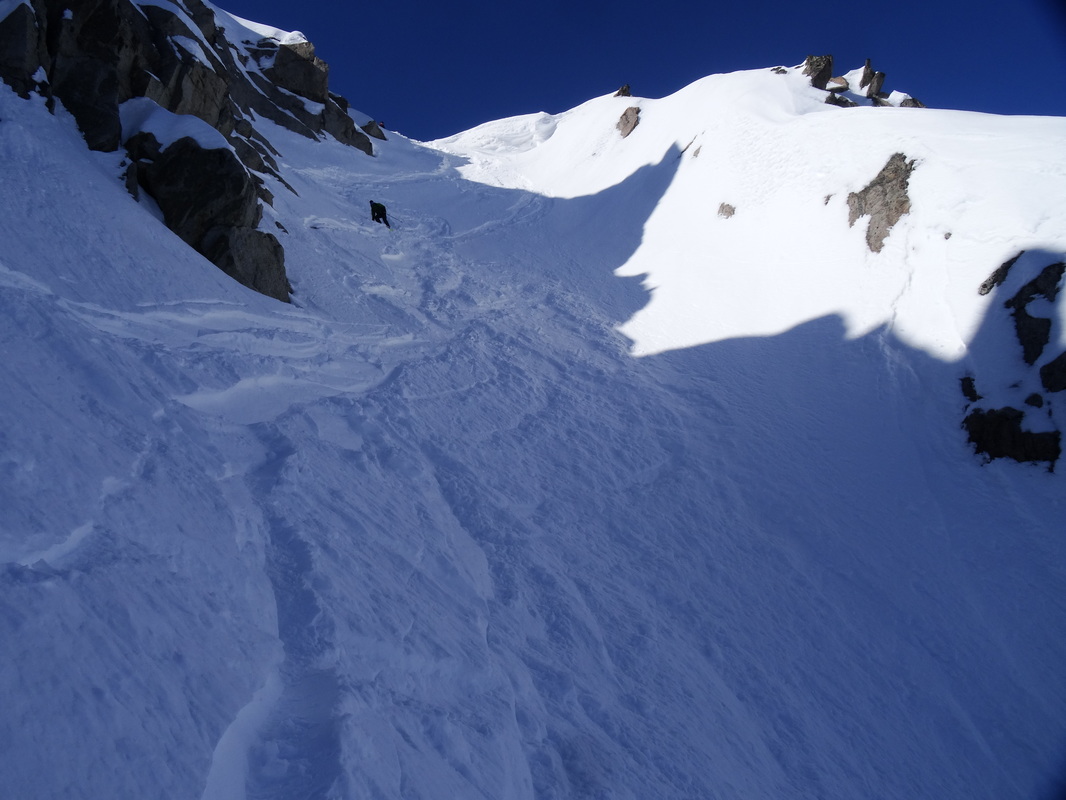
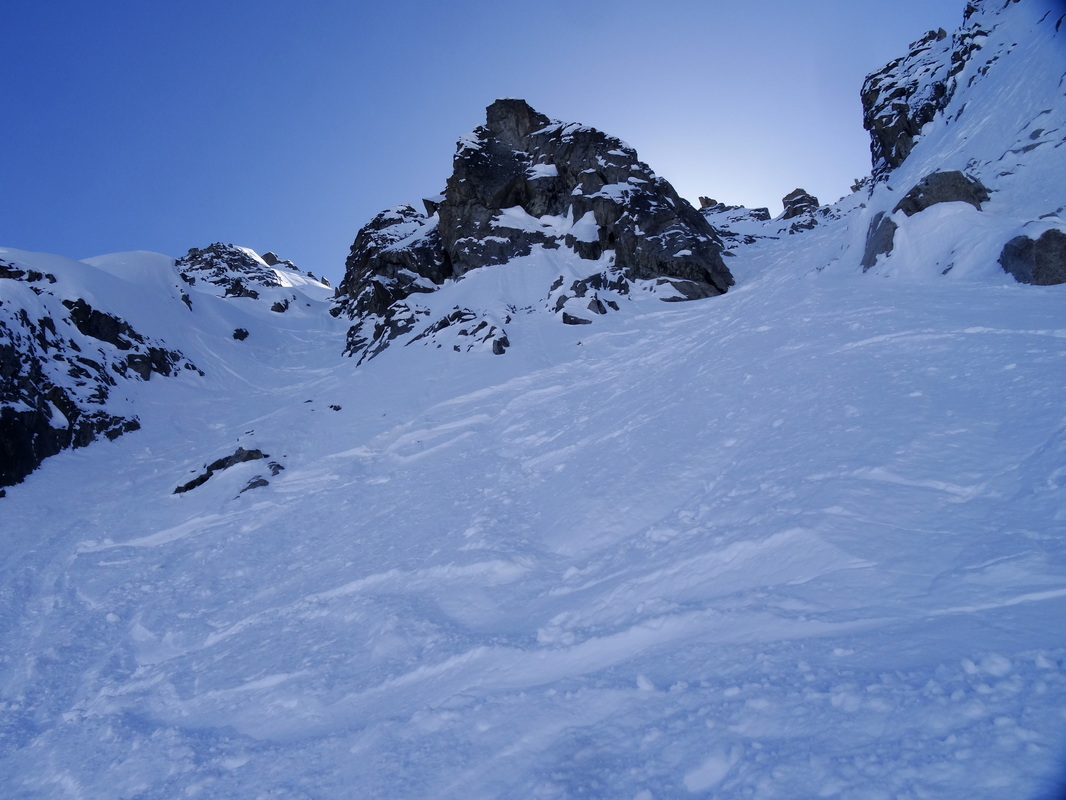
Moving into March, with much more stable snow conditions, we set out on a tour to summit le Génépi in the Massif du Mont Blanc. After great snow fall in February, then a long period of sunshine, we knew it had to be a north face, and a steep one at that, hence we chose the NE coulouir of le Génépi as our descent. As ever here is a route description accompanied by some beautiful photos taken by Pierre.
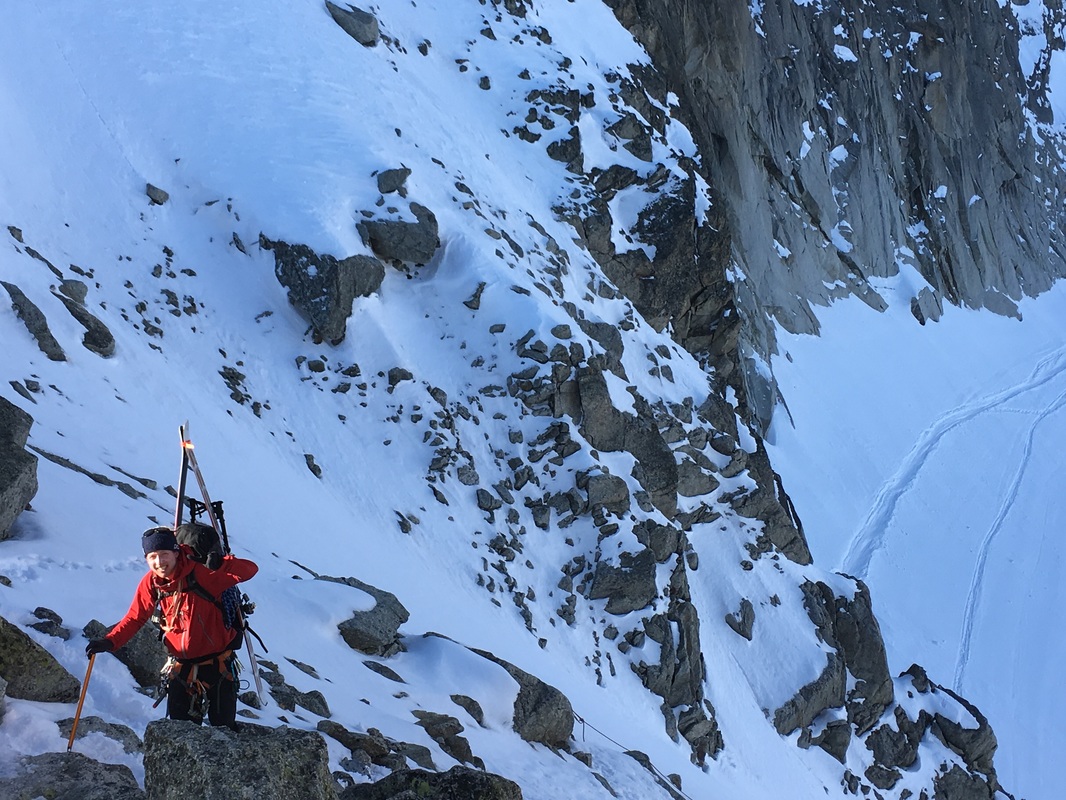
By car, drive in the direction of Champex d'en Bas, parking in the tiny hamlet of La Poya (1275m). Follow the forest path through Plan de l'Au in the direction of la Djure. From here pass to the right heading up a steep slope above the limit of the forest (Ski crampons advised if spring conditions prevail). From here continue to skin up the ridge until the gentle slopes of Chaux de Bovine. The terrain then kicks up as you continue S towards lac du Dru. Contiune up the ridge to gain the summit via the SW ridge. Attach skis to your pack before climbing a short section of grade III mixed terrain (Rope advised for those less sure on their feet, or used to climbing with a full pack after a 5 hour skin!)
By car, drive in the direction of Champex d'en Bas, parking in the tiny hamlet of La Poya (1275m). Follow the forest path through Plan de l'Au in the direction of la Djure. From here pass to the right heading up a steep slope above the limit of the forest (Ski crampons advised if spring conditions prevail). From here continue to skin up the ridge until the gentle slopes of Chaux de Bovine. The terrain then kicks up as you continue S towards lac du Dru. Contiune up the ridge to gain the summit via the SW ridge. Attach skis to your pack before climbing a short section of grade III mixed terrain (Rope advised for those less sure on their feet, or used to climbing with a full pack after a 5 hour skin!)
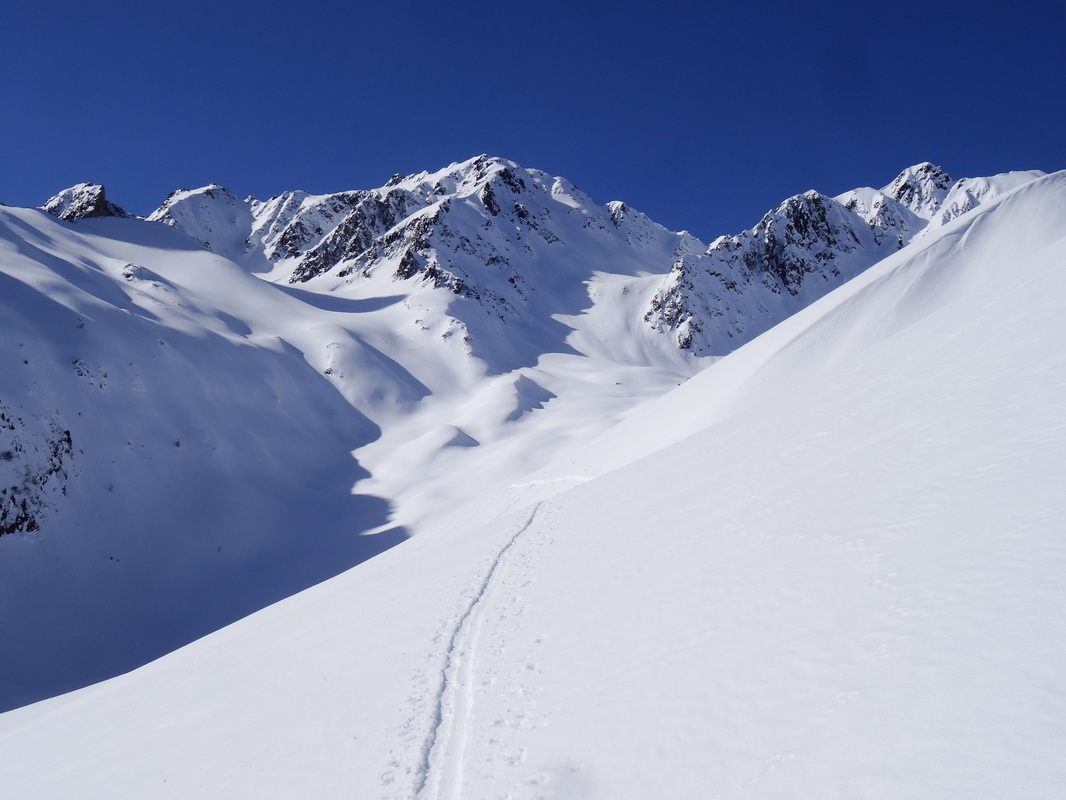
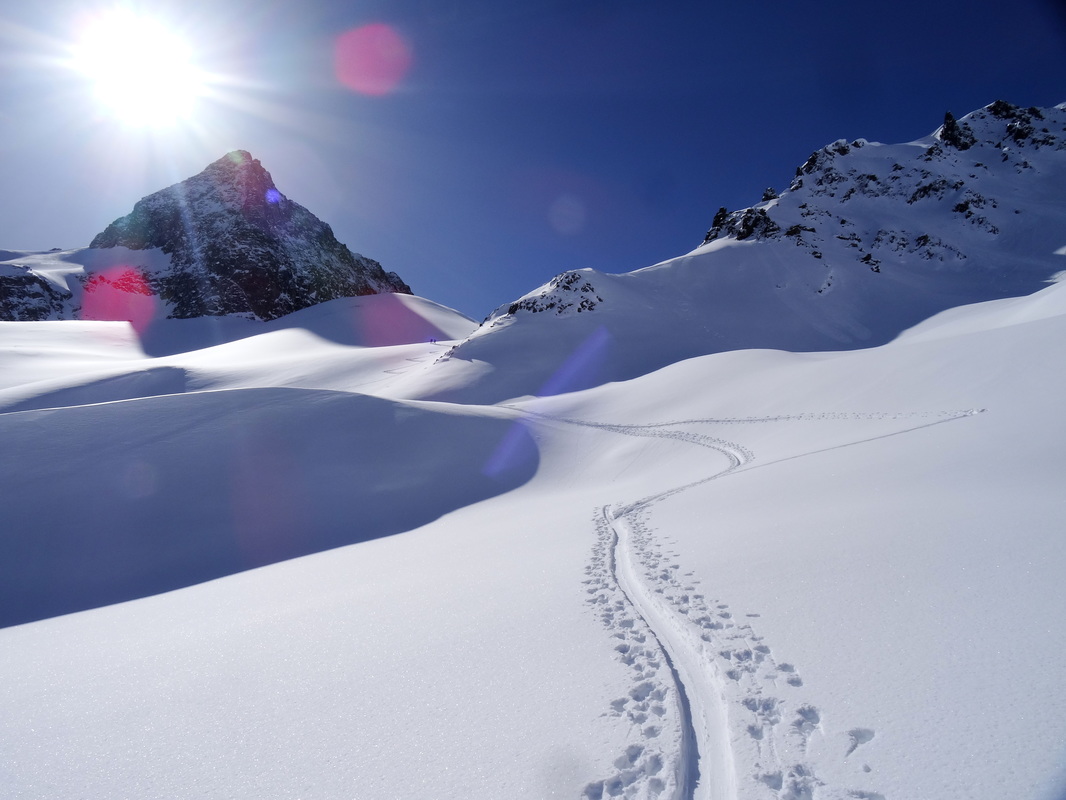

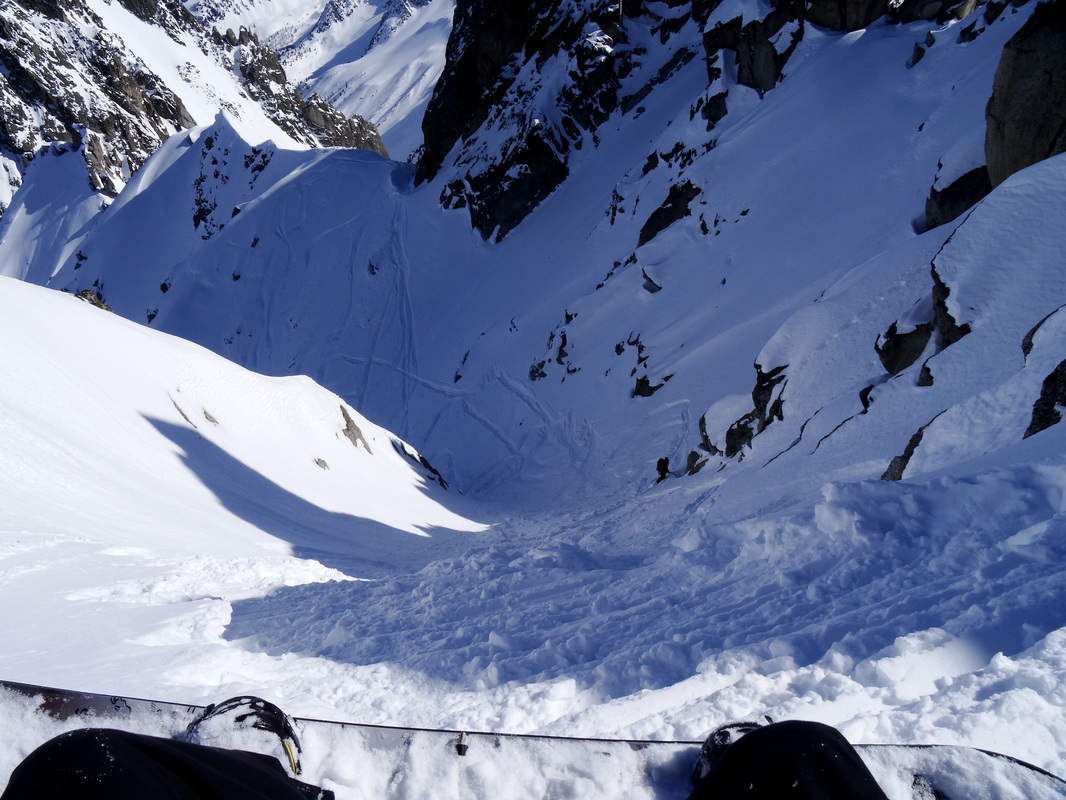
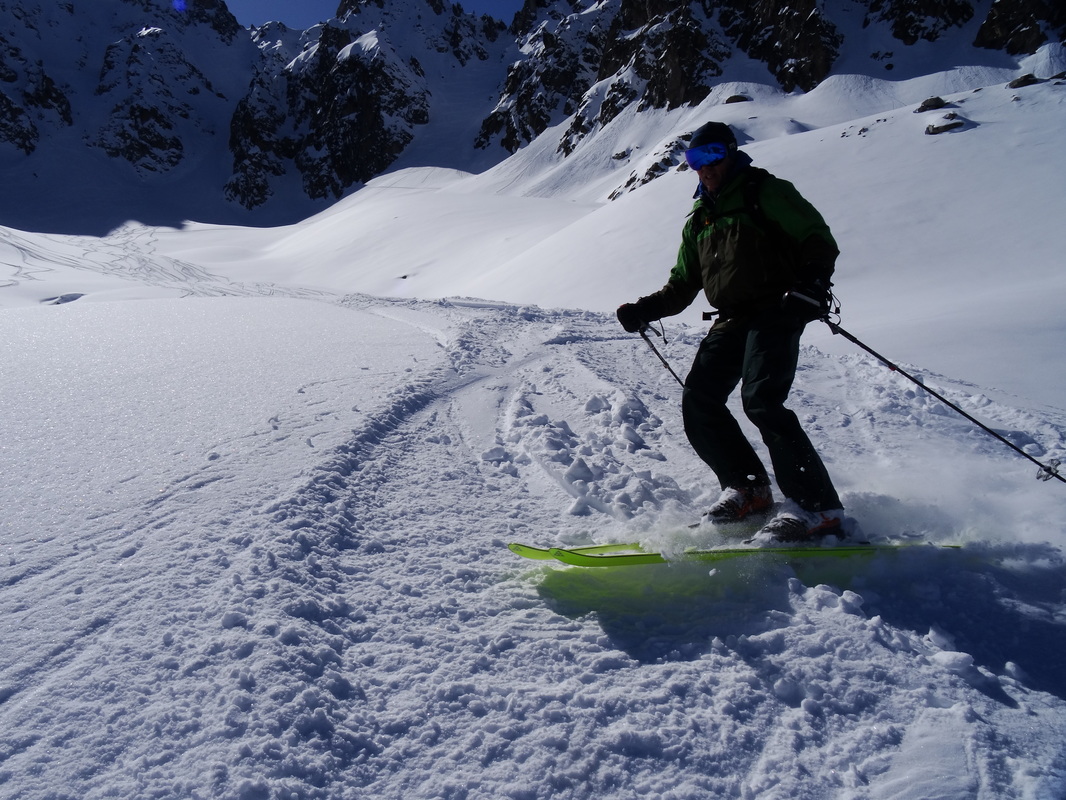
After a quick snack on the summit, we set off on the best descent of the season so far, entering the couloir on a slope of more than 45 degrees, before the couloir opened up. The snow was heavy but still super cold making for a glorious ski down, with a great atmosphere.
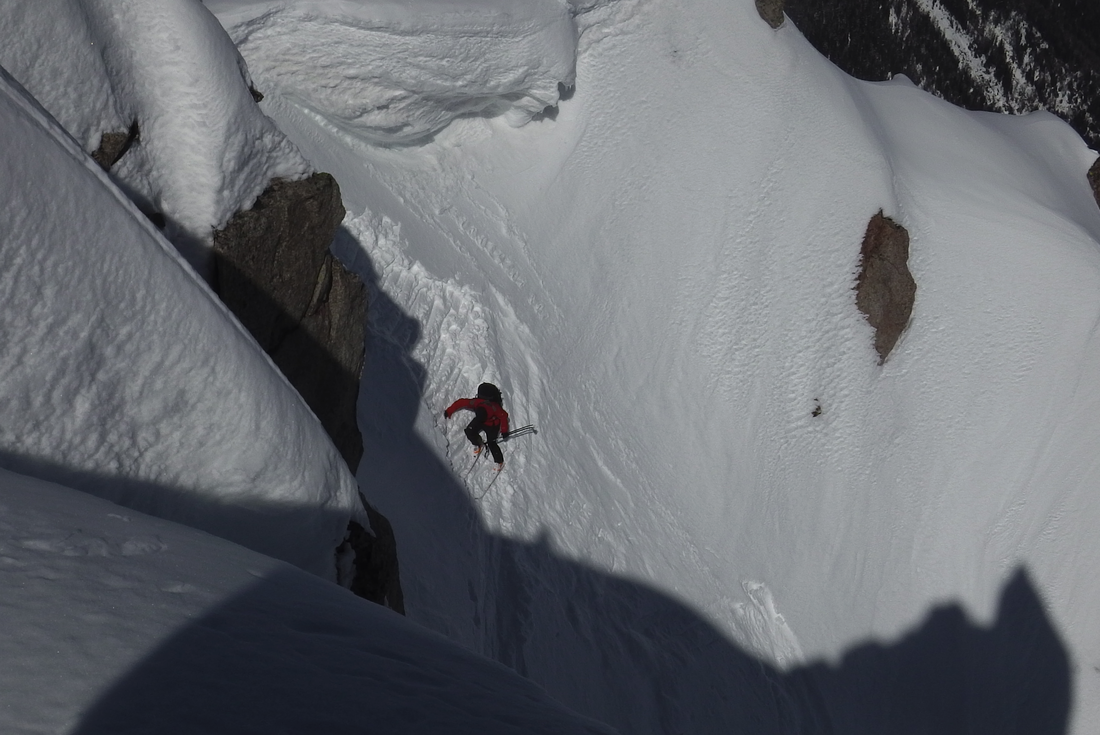
Olly drops in!
Le Génépi was a great day out and well worth the 5 hour skin up for such a fabulous descent back down to Champex. One thing is for sure, we will be back!
 RSS Feed